In this article, we will guide you through configuring DNS settings in Exchange Server 2019. For this setup, internal DNS servers will hold a copy of the external namespace. This approach involves cloning the external DNS records to the internal DNS server with minimal adjustments to Exchange records. Internal users will utilize these records for internal communication
Table of Contents
How to Set Up a Forward Lookup Zone in DNS Manager
- Open DNS Manager:
- On your Active Directory DNS server, open DNS Manager.
- Create a New Forward Lookup Zone:
- Right-click on Forward Lookup Zones and select New Zone.
- Click Next to proceed with the New Zone Wizard.
- Select Zone Type:
- Choose Primary Zone (default option) and click Next.
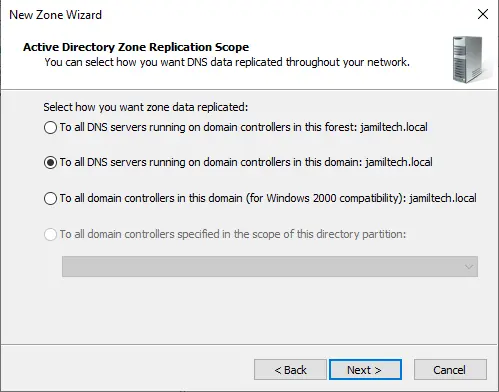
- For Zone Replication Scope, select To all DNS servers in this Active Directory domain and click Next.
- Enter Zone Name:
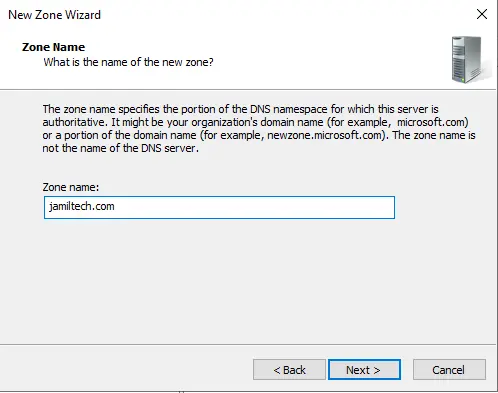
- In the Zone Name field, enter your external domain name (e.g., jamiltech.com).
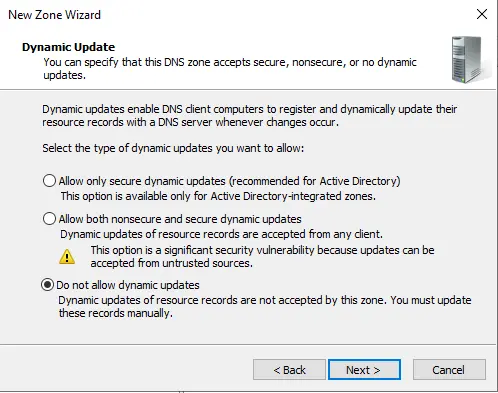
Select Don’t allow dynamic updates since we will manually create all records. Click Next and then Finish.
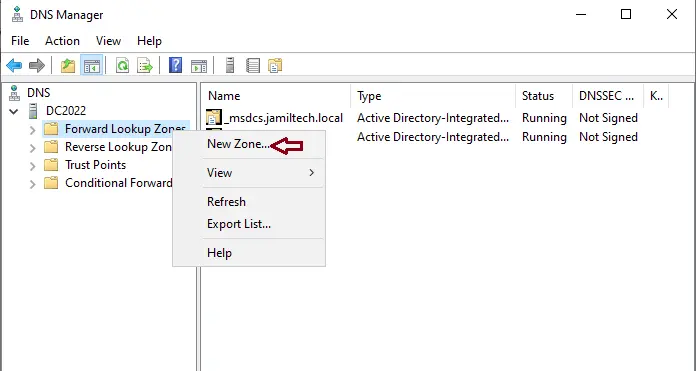
Click next
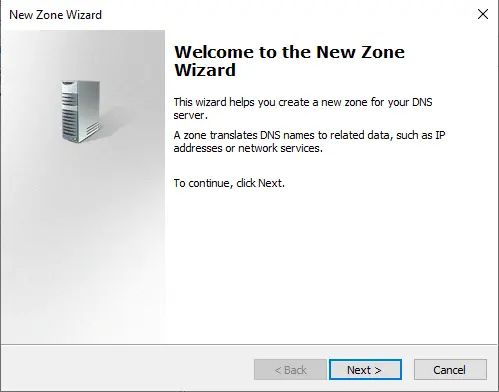
For default settings, click next.
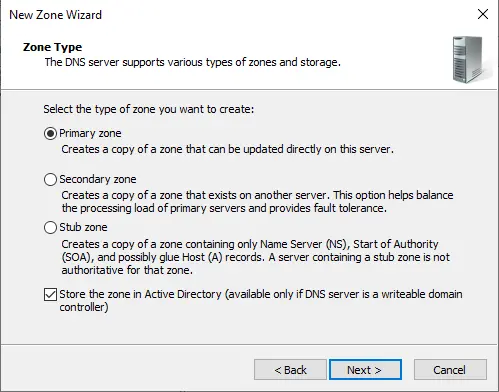
Choose Next
In the zone name field, enter the external domain name (my external domain is jamiltech.com)
Select Don’t allow dynamic updates. We will manually create all the records in this zone, so click next.
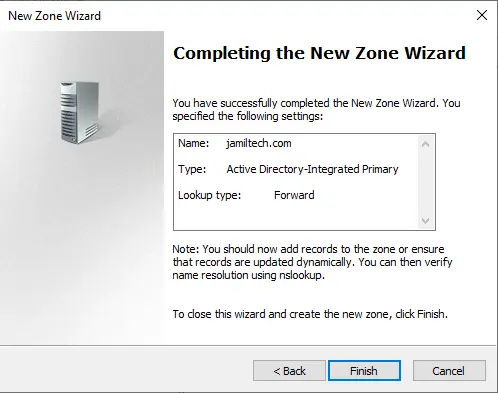
Select finish
How to Add a Host (A) Record in DNS Manager
- Expand Forward Lookup Zones:
- Right-click on your external domain (e.g., jamiltech.com) and select New Host (A or AAAA).
- Enter Host Details:
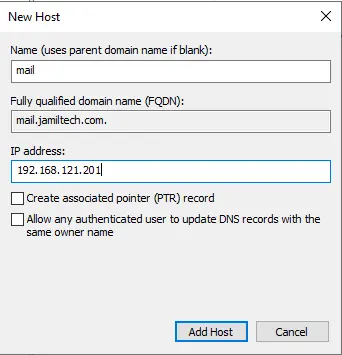
- In the Name field, enter the name for your certificate.
- In the IP Address field, enter the internal IP address of your Exchange server (e.g., 192.168.121.201).
- Click Add Host.
- Confirm Record Creation:
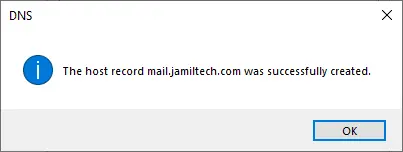
A message will appear stating, “The host record was created successfully.” Click OK.
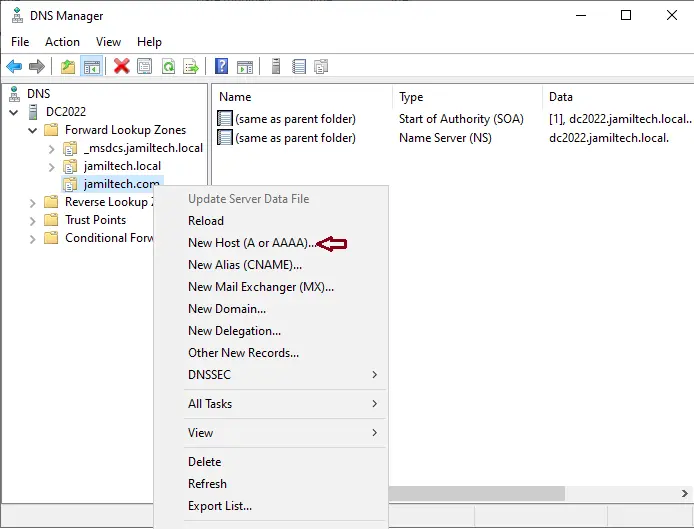
In the name field, enter the name on your certificate.
Under the IP address field, enter the internal IP of your Exchange server.
For example, it is 192.168.121.201
Click Add Host.
“The host record was created successfully.”
Click ok.
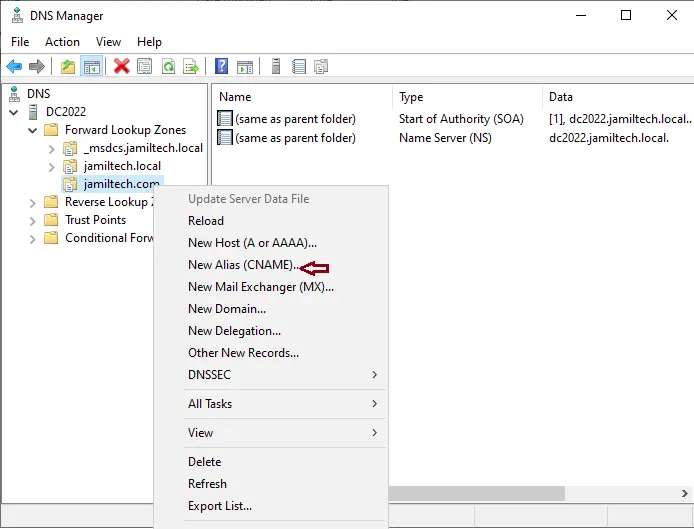
How to Create an Alias (CNAME) Record
- Create a New Alias:
- Right-click on your external domain (e.g., jamiltech.com) and select New Alias (CNAME).
- Enter Alias Details:
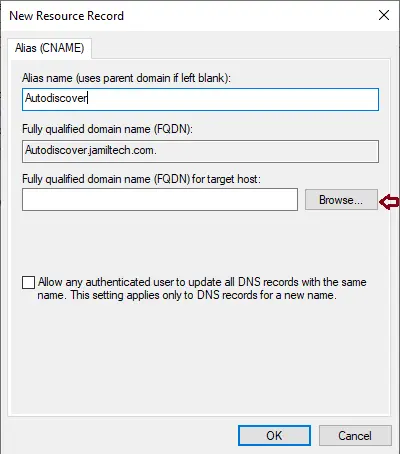
- In the Alias name field, enter the alias (e.g., autodiscover).
- Click Browse to select the target host.
- Select Target Host:
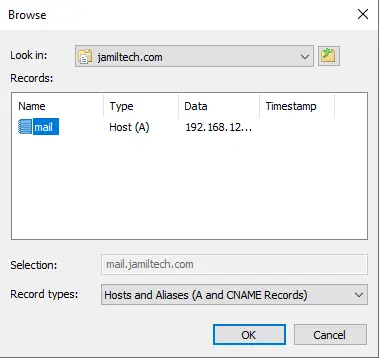
- Browse and select the target host. For example, select your Exchange server or other appropriate service.
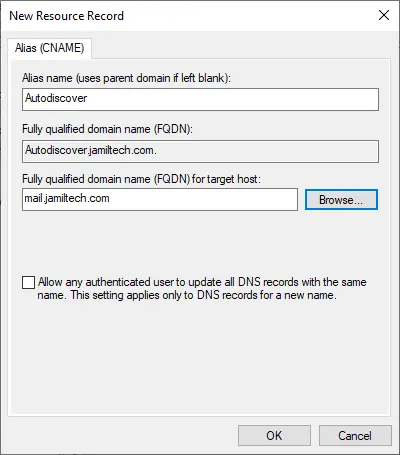
Click OK to complete the alias creation.
In the alias, the name field enters a name (autodiscover) for the certificate and then clicks browse.
Choose your DNS server.
Forward lookup zones
Your external domain (jamiltech.com)
Select Mail, and then click OK.
Click ok
How to Create a Mail Exchange (MX) Record
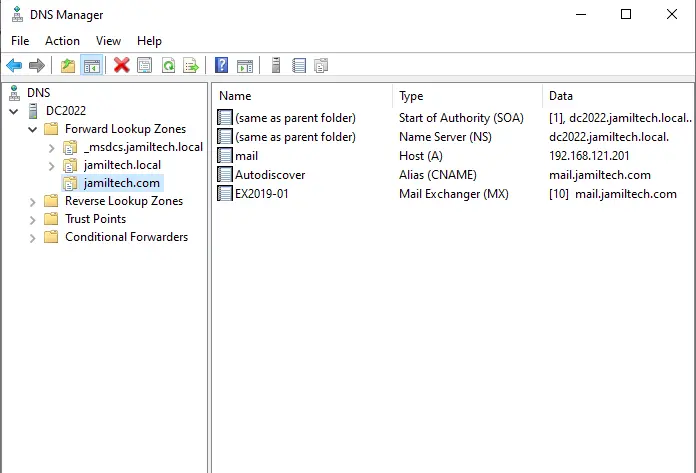
After adding the MX record, ensure it reflects the correct mail server settings.
Create a New MX Record:
Right-click on your external domain (e.g., jamiltech.com) and select New Mail Exchange (MX).
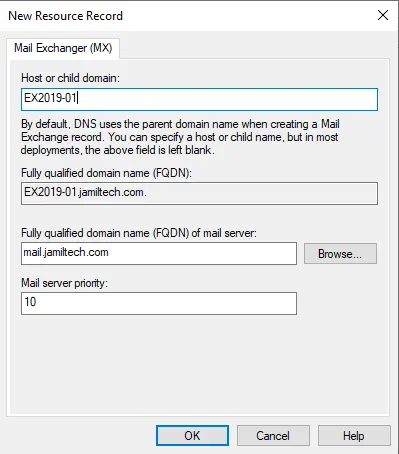
Enter MX Record Details:
Click Browse to select your DNS server and domain.
Enter the Exchange server name and click OK.
Complete MX Record Setup:
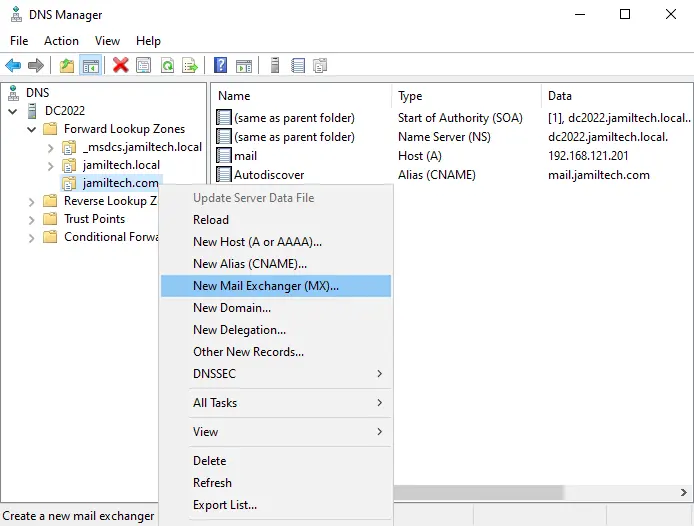
Click browse
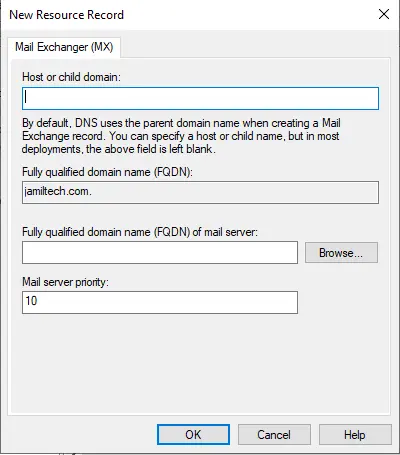
Select your DNS server.
Forward lookup zones
External domain (jamiltech.com)
Select Mail, and then click OK.
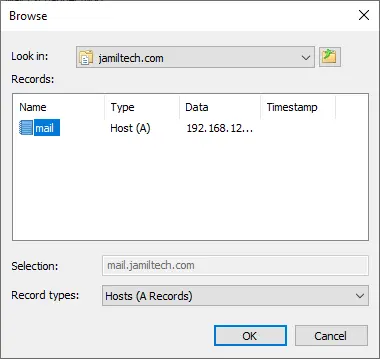
Enter the exchange server name, and then click OK.
After creating records,.
Verification and Testing
- Verify DNS Records:
- Use the Command Prompt to verify the host records. Run commands like nslookup to check if the records resolve correctly.
- Test Internal Services:
Check that you can access Autodiscover and the Outlook Web App internally. For example, navigate to https://mail.jamiltech.com/owa in a web browser. You may see a certificate error, but you should reach the login page and be able to log in.
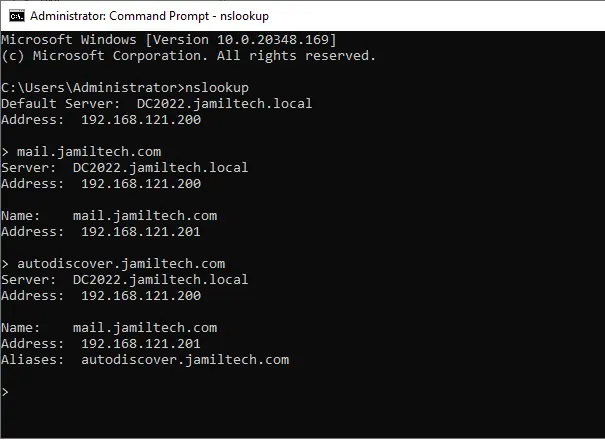
By following these steps, you will have successfully configured DNS settings for Exchange Server 2019, ensuring that internal users can access email and related services smoothly. For more detailed information.
Related: How to Backup and Restore Exchange Database
Refer to this article for more detail about DNS settings in Exchange Server.

