Why Backup VMware vCenter 8.0?
Backing up your VMware vCenter Server Appliance ensures that you can quickly recover in the event of a failure. The file-based backup option available in vCenter 8.0 supports the VCSA and the Platform Services Controller (PSC), offering a native backup solution without the need for third-party tools. This backup can be stored on an FTP, FTPS, HTTP, HTTPS, SCP, SMB, or NFS server.
Prerequisites
- vCenter Server 8.0 Appliance (VCSA) installed and configured.
- A backup server configured to store the backups. This can be any server supporting the following protocols: FTP, FTPS, HTTP, HTTPS, SCP, SMB, or NFS.
- Root access to the vCenter Server Appliance.
Table of Contents
Step-by-Step Guide to Backup VMware vCenter Server 8.0
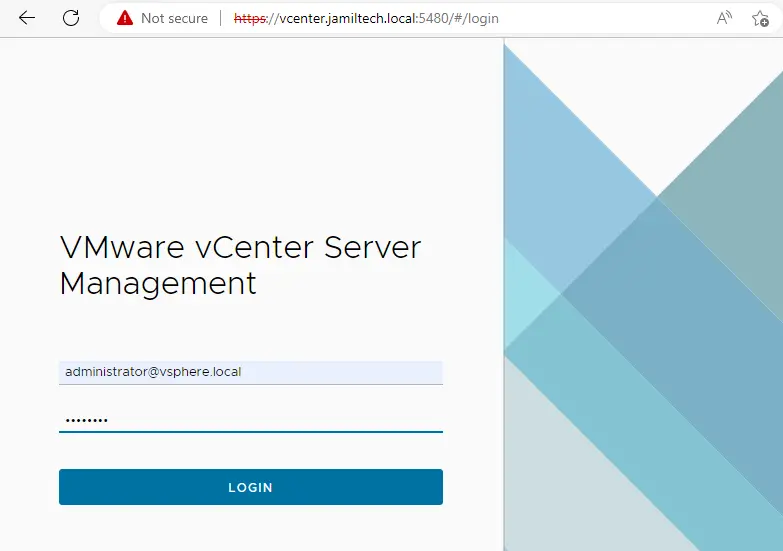
Step 1: Log in to the vCenter Server Management Interface
- Open a web browser.
Enter the following URL to access the vCenter Server Management Interface:
arduino
Copy code
https://<FQDN-or-IP>:5480
- Replace <FQDN-or-IP> with the Fully Qualified Domain Name or IP address of your vCenter Server.
- Log in using the root credentials.
Step 2: Configure the Backup Server
Before proceeding, ensure that your FTP or another backup server is properly configured. Follow my article on setting up a FileZilla FTP server if using FTP.
Step 3: Access the Backup Menu
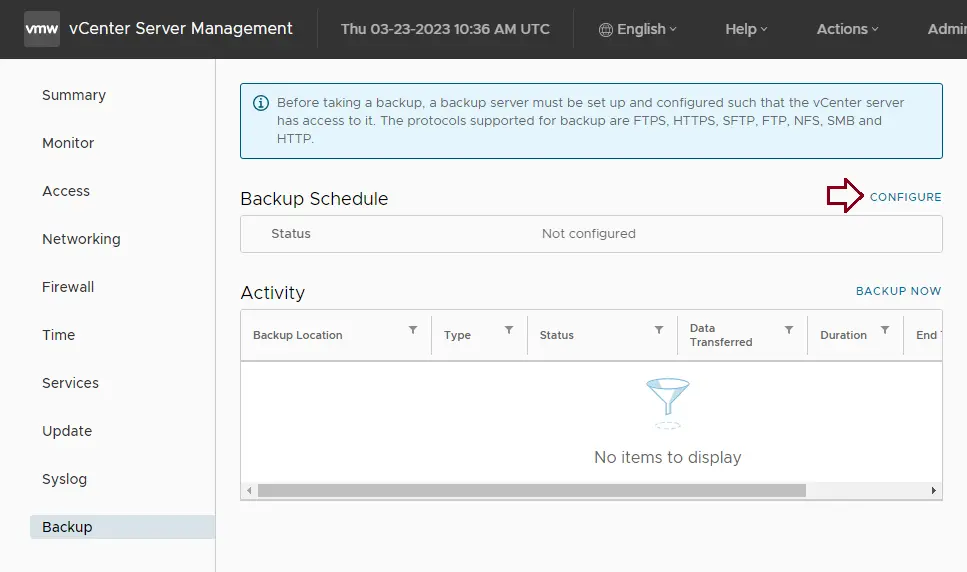
- After logging in, click on the Backup tab in the left-hand menu.
- Click on the Configure button.
Step 4: Enter Backup Location Details
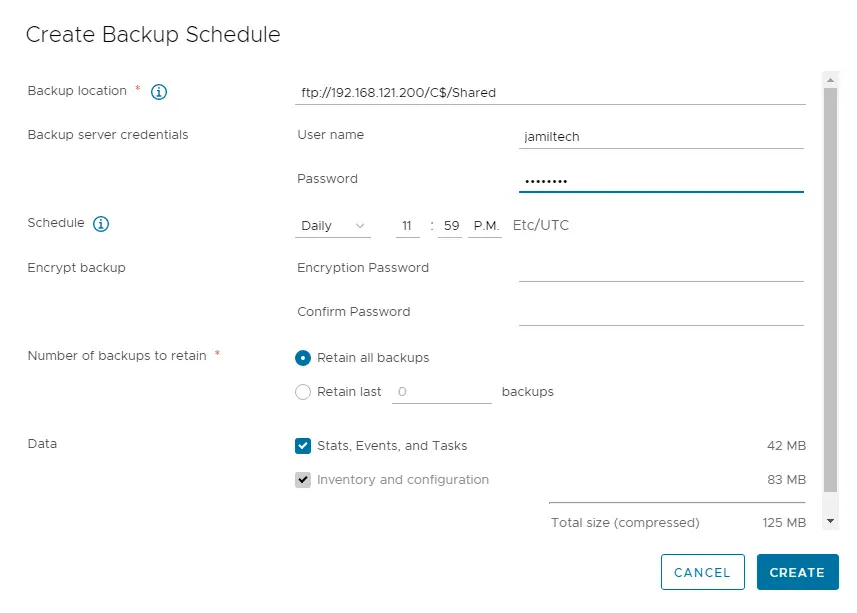
- In the Backup Configuration screen, enter the Backup Location details:
- Protocol: Choose from FTP, FTPS, SCP, HTTP, HTTPS, SMB, or NFS.
- Port: Enter the port number associated with the selected protocol.
- Server Address: Enter the IP address or domain name of the backup server.
- Backup Location: Enter the specific folder or path on the backup server.
- Username and Password: Provide the backup server credentials.
- Configure any additional settings such as the retention policy or encryption settings (if available).
Step 5: Schedule the Backup
- Set up a backup schedule by selecting the frequency (daily, weekly, etc.) and the time for the backup to occur.
- Confirm the backup configuration and click on Save.
Type your backup location details (containing the protocol, port, server address, and backup location). Use protocols FTP, FTPS, NFS, HTTP, HTTPS, SFTP, and SMB. The path is associated with the main directory) and backup server login credentials (include the user name and password).
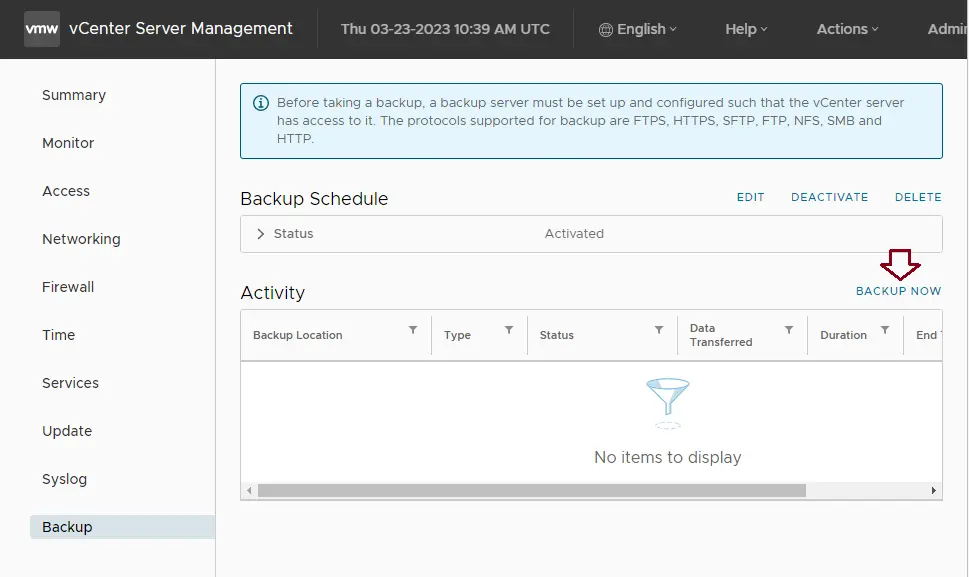
After completing the VMware vCenter Server 8.0 backup schedule, click on Backup Now.
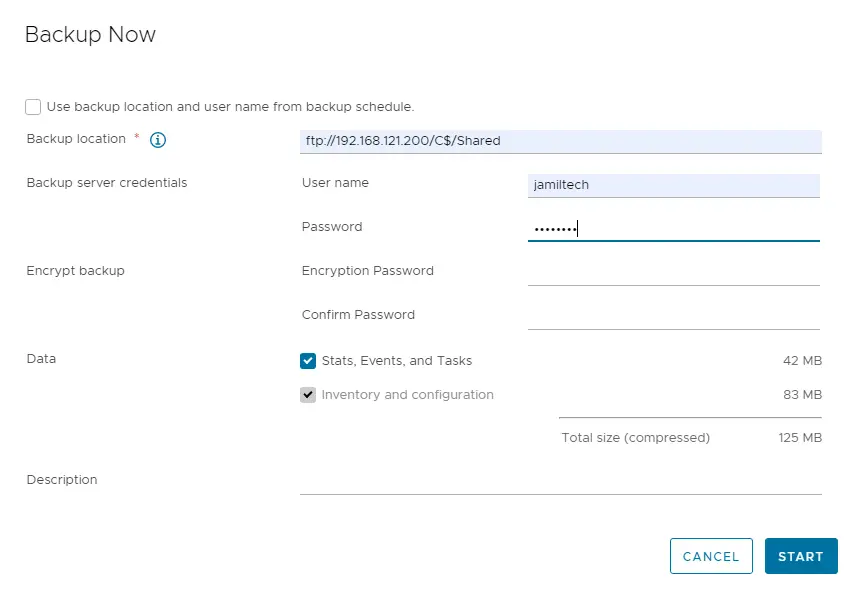
Verify your backup FTP server location, username, and password, and then click Start.
Step 6: Start the Backup
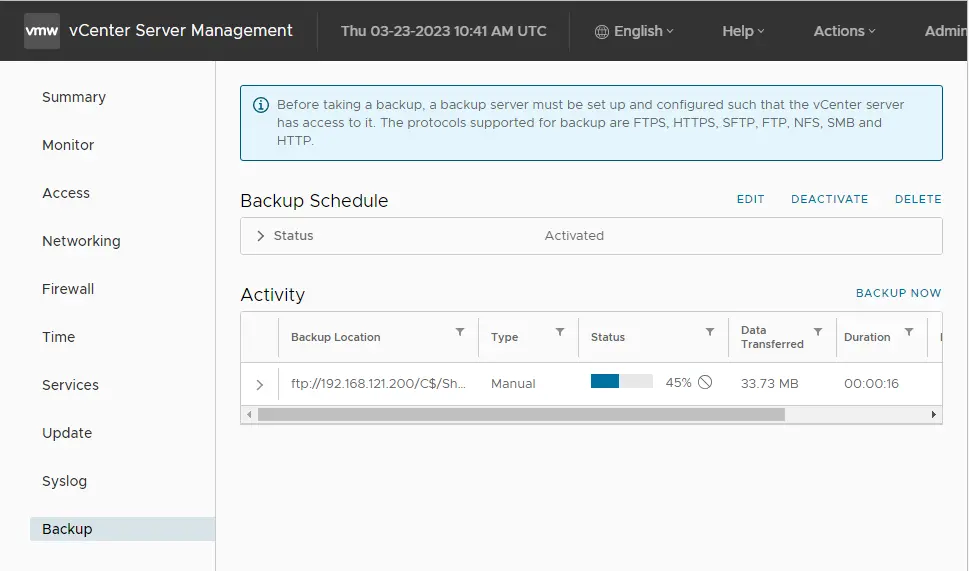
- After scheduling, you can also manually trigger a backup by clicking on Backup Now.
- Verify the entered details, including location, username, and password, and click Start.
- The backup process will begin. You can monitor its progress in the vCenter Server Management Interface.
Step 7: Verify the Backup
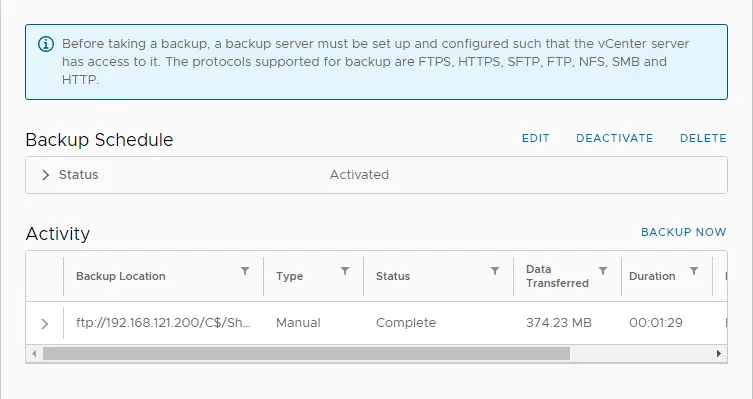
- After the backup completes, you will see a Backup Complete notification.
- Navigate to the backup server (e.g., FTP server), and verify that the backup files are saved in the specified location.
The vCenter Server appliance backup was successfully completed.
Important Notes
- Backup Frequency: For critical environments, it’s recommended to schedule frequent backups of the vCenter Server, especially after any configuration changes.
- Storage Location: Ensure the backup storage has sufficient space and is secure.
- Protocol Choice: Choose a protocol that fits your security and performance needs. For secure environments, consider using SFTP or FTPS.

By following this guide, you’ve successfully backed up your VMware vCenter Server Appliance 8.0. This will help ensure operational continuity in case of any failures or unexpected issues with your vCenter Server.

