
In this article, I will show you how to configure VMware ESXi Server, configure the networking for the ESXi 8.0 host, and assign the IP address, DNS, and other configurations. In my earlier article, I wrote about VMware ESXi 8.0 step-by-step installation. You can use the DCUI (Direct Console User Interface) to configure the ESXi host and set it up. The DCUI interface enables you to configure and troubleshoot ESXi server networking on hosts without using the vSphere Client.
Table of Contents
Configure VMware ESXi Server
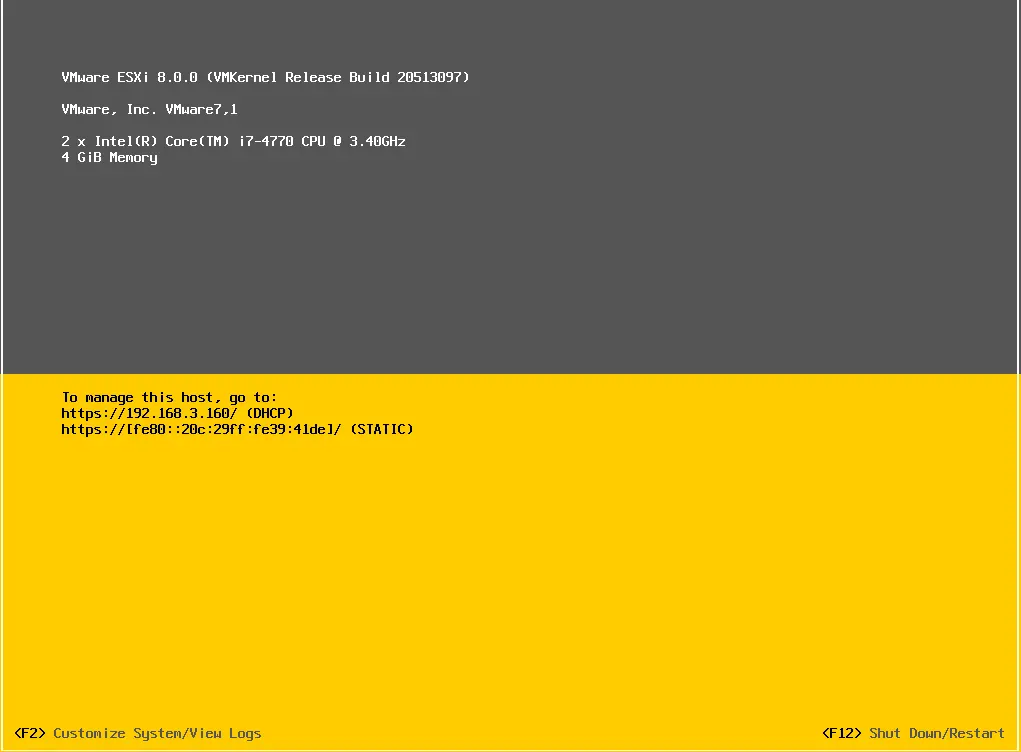
Once you install and turn on the ESXi host, you should see the screen below.
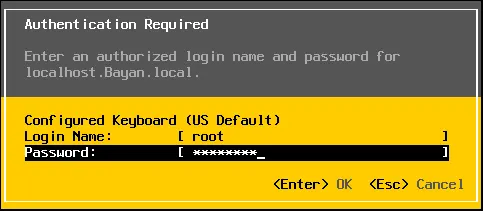
Hit the F2 key to access the ESXi configuration screen.
You will have to enter the administrative login credentials that you set up during the ESXi 8.0 installation.
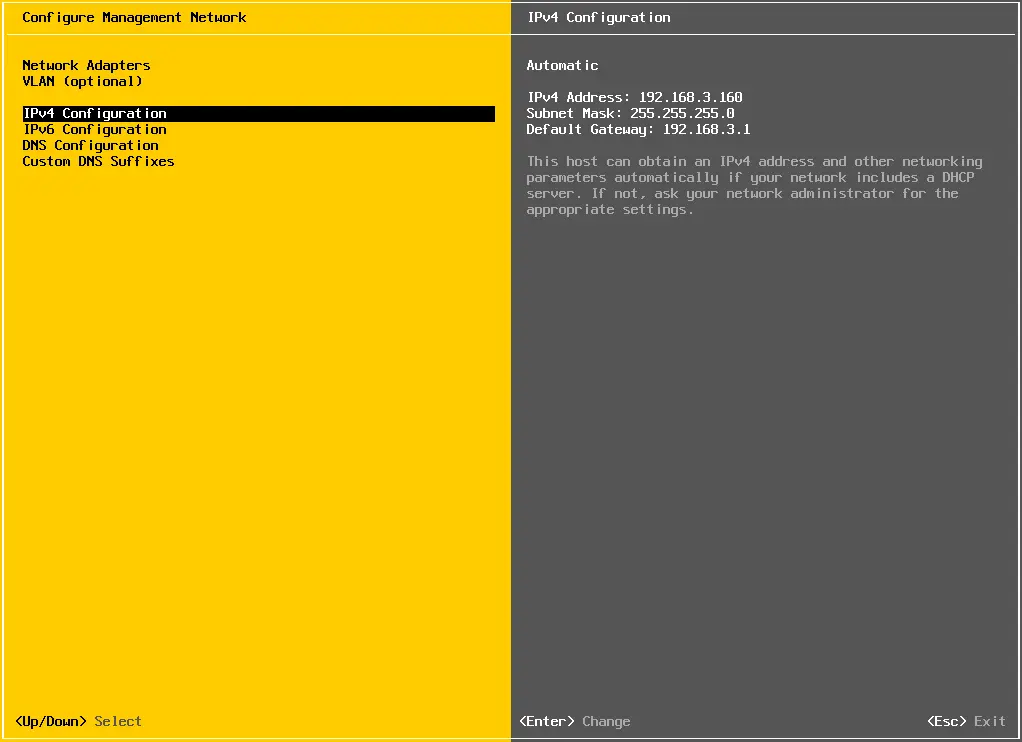
Go to the Configure Management Network option to modify settings. You can see on your right side the hostname and IPv4 network identities acquired from the DHCP server, which we need to configure as static IPs.

Click on the IPv4 configuration and hit enter.
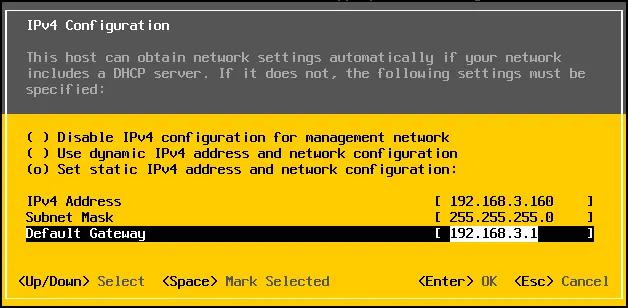
Set the static IPv4 address, assign the IPv4 address, subnet mask, and default gateway, and then press enter.
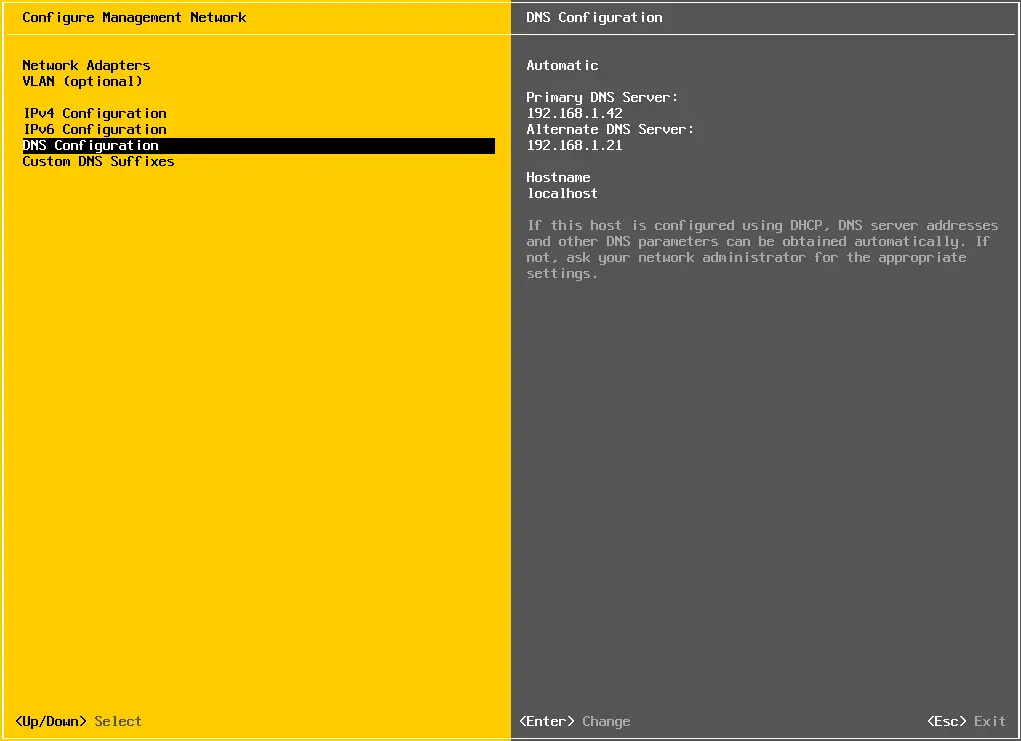
Choose the DNS Configuration option, and then hit enter.
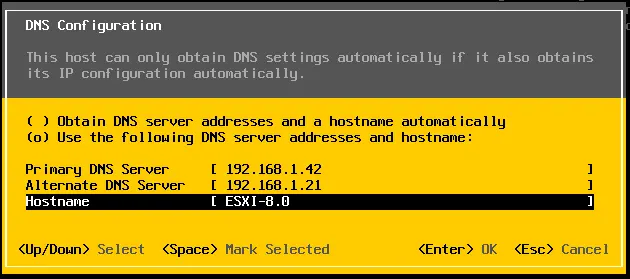
Set your primary and alternate DNS IP addresses (hostname), and then press enter.
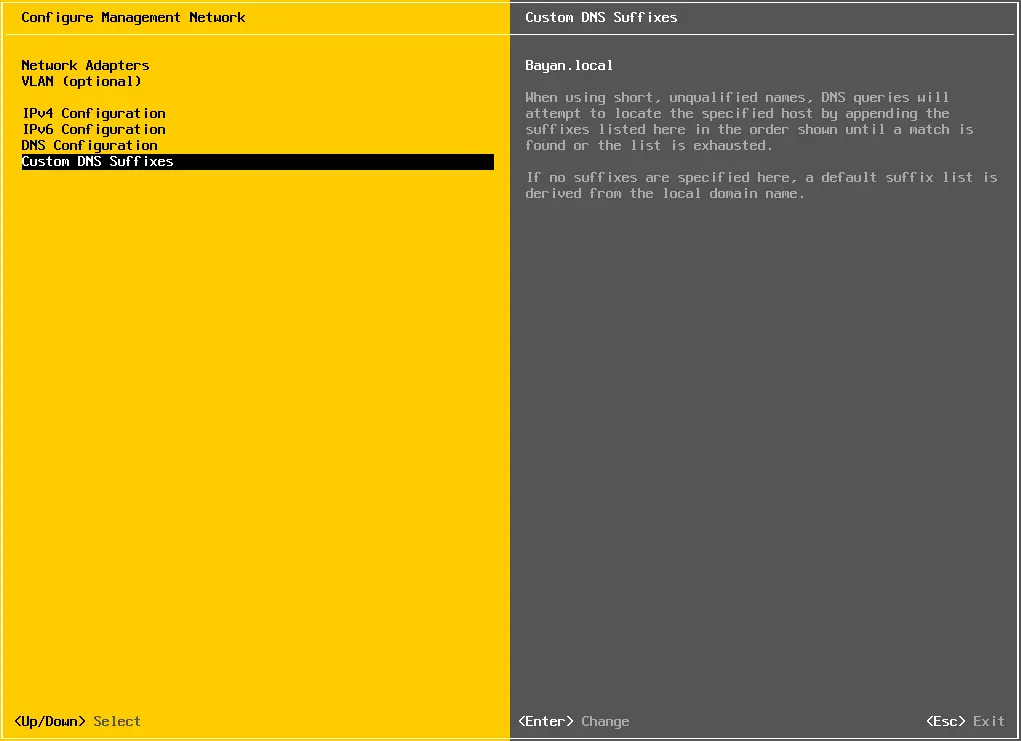
Choose Configure Custom DNS Suffixes and press enter.
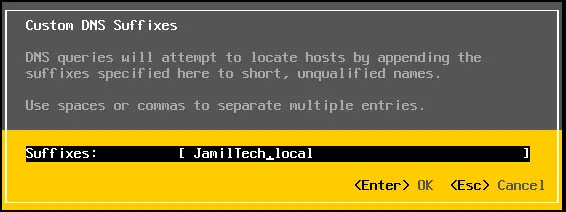
Enter custom DNS suffixes and then hit enter.
Hit the Esc button.

Type Y
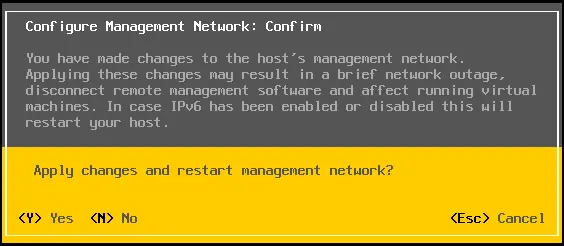
I have disabled the IPv6 network. A restart is required for the task.
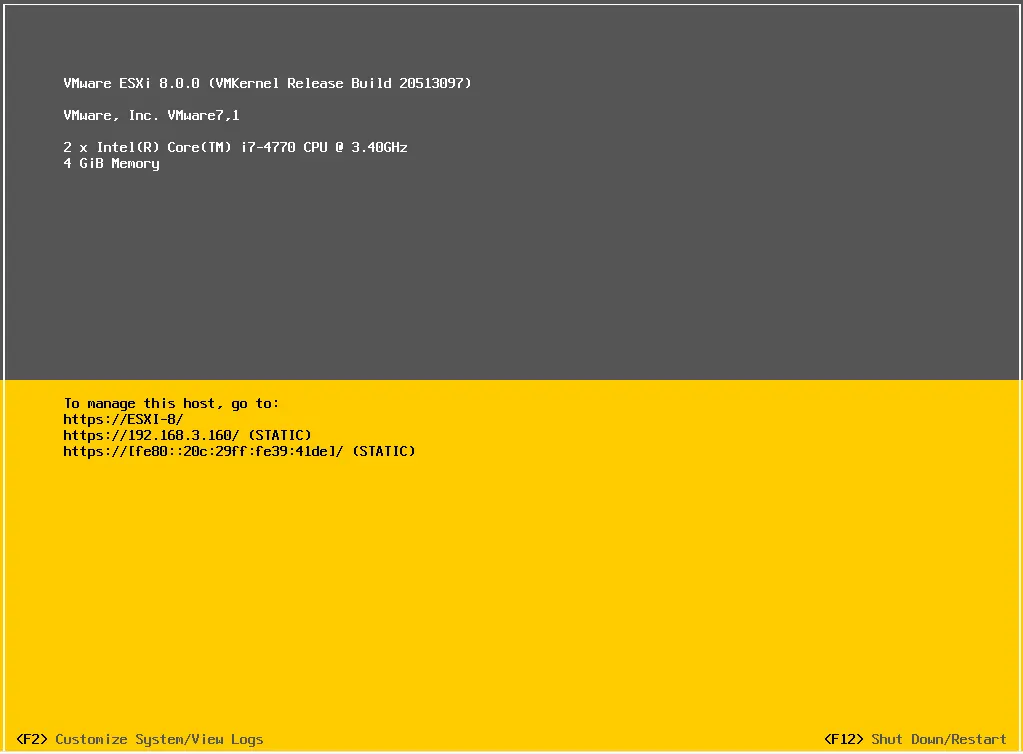
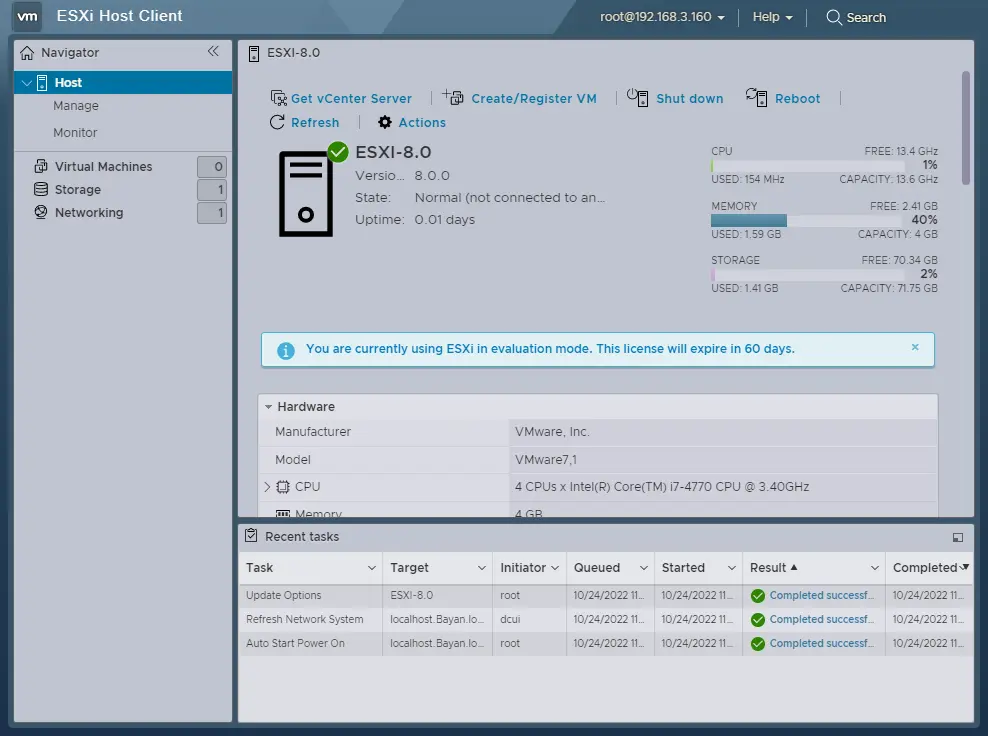
After restarting the ESXi host, the ESXi server is ready, and it is showing host management information.
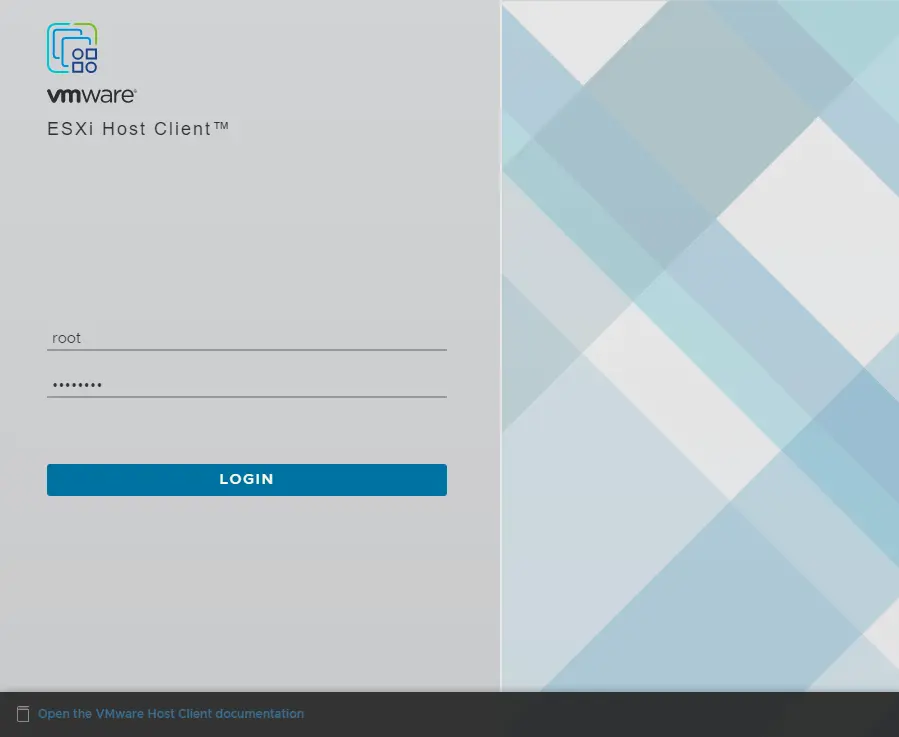
Login with ESXi Host
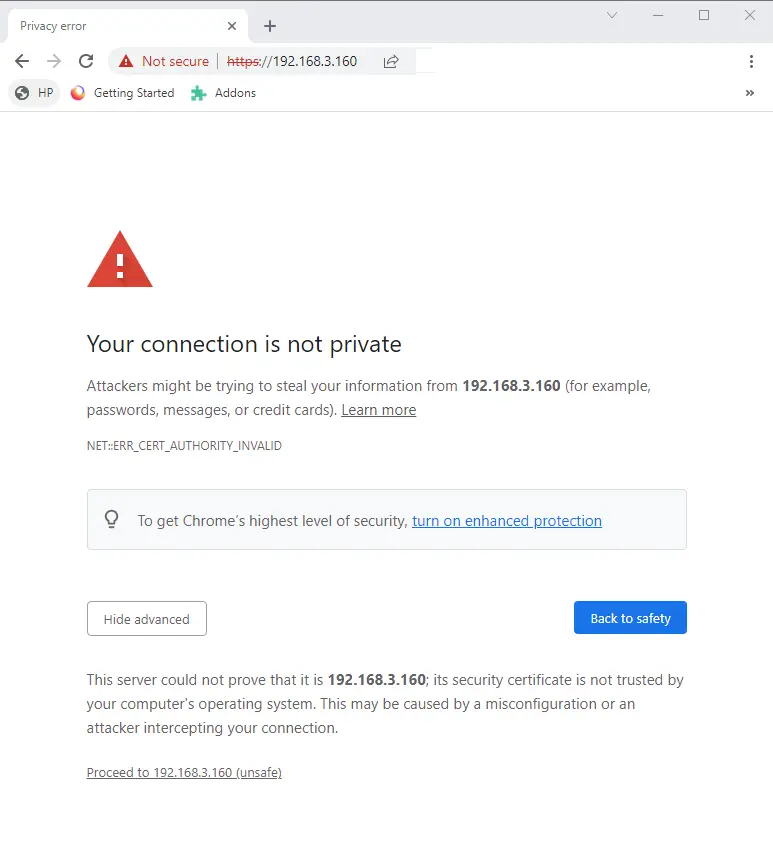
Type the host management URLs in your browser.
Click on advanced options, and then proceed.
Enter the root username and password, and then select Login.
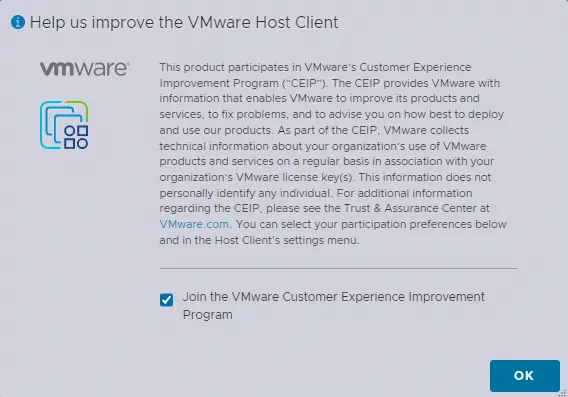
After successful login, it asks for VMware’s Customer Experience Improvement program. You can join the program and then click OK.
Finally, the ESXi 8.0.8 server is ready to deploy Virtual Machines.
Visit this article to learn more about configuring the VMware ESXi host.
