
In this article, we will learn how to Create Hyper-V Cluster Windows Server 2022. We will explore the practical quality of Hyper-V failover clustering configuration, including initial host setup and network configuration, Windows Hyper-V role installation, and then cluster creation. One of the essential requirements for virtual infrastructures, specifically in large data centers, is the removal of a single point of failure and guaranteeing the high availability of services and applications. In a Microsoft Hyper-V environment, the Failover Clustering technology is available to configure multiple Hyper-V nodes (or hosts) that can take over the load if one host is down.
Systems Requirements for Hyper-V Cluster
HyperV22-01 (Node 1), Windows Servers 2022
192.168.121.212
192.168.52.251
HyperV22-02 (Node 2), Windows Servers 2022
192.168.121.214
192.168.52.252
First, you need to Install Windows Server 2022
Follow the Install Hyper-V role on Windows Server 2022
1 Windows Server 2022 (iSCSI Storage) with 2 drives configured
192.168.121.150
Visit my article, How to Configure Target iSCSI Server
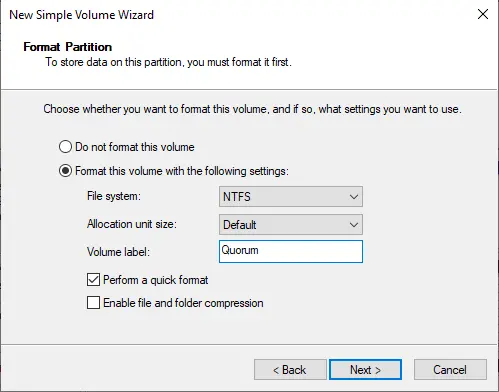
Drive 1: 20 GB (Quorum)
Drive 2: 200 GB Virtual Machine Storage
Microsoft Windows Server 2022 with Hyper-V Capabilities
Once installing and configuring the iSCSI server is done,. Log in to your first hyper-v node (HyperV22-01)
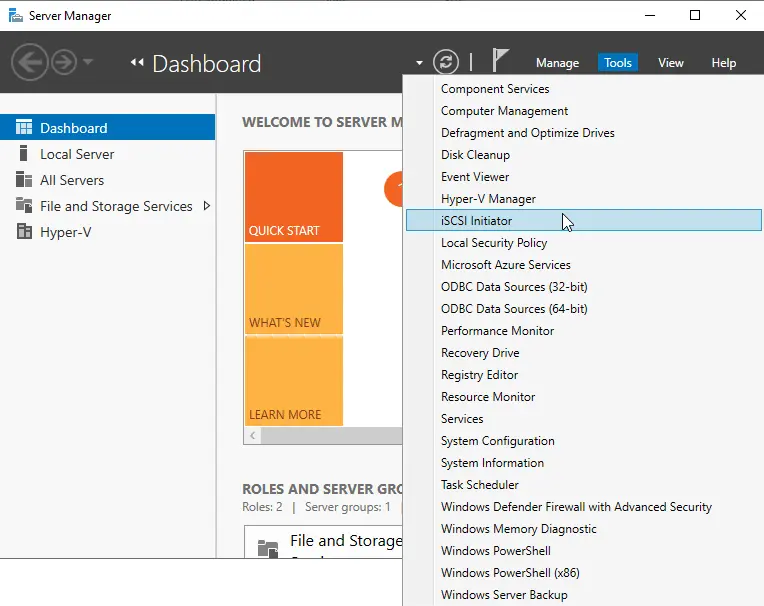
In Server Manager 2022, click on the Tools tab and then choose iSCSI Initiator.
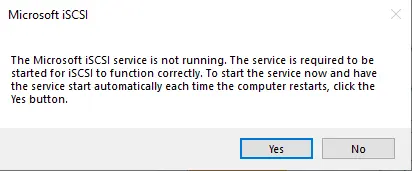
Click yes to start the Microsoft iSCSI service.
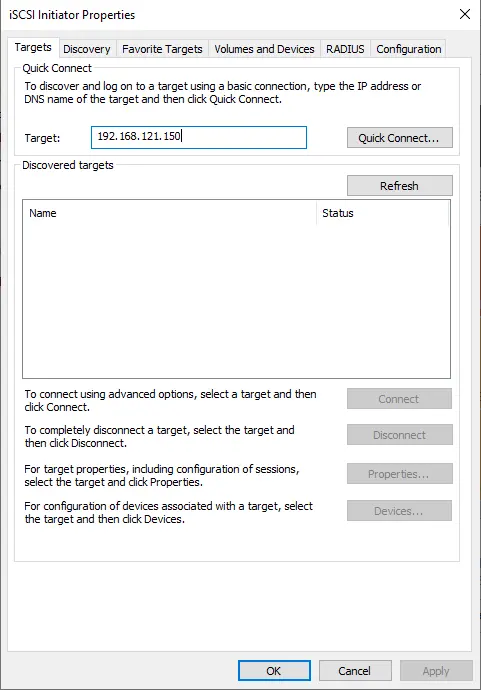
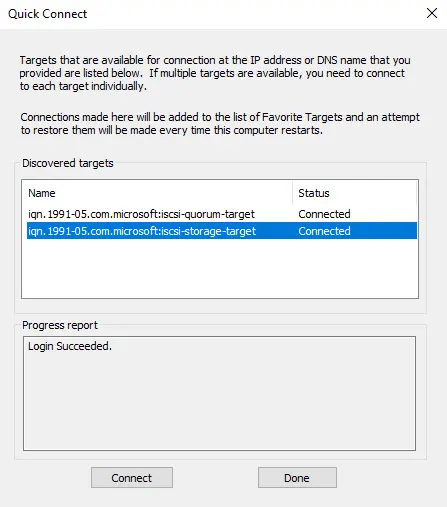
In the iSCSI initiator properties, type the address of the iSCSI target, and then click on Quick Connect to connect to the discovered targets.
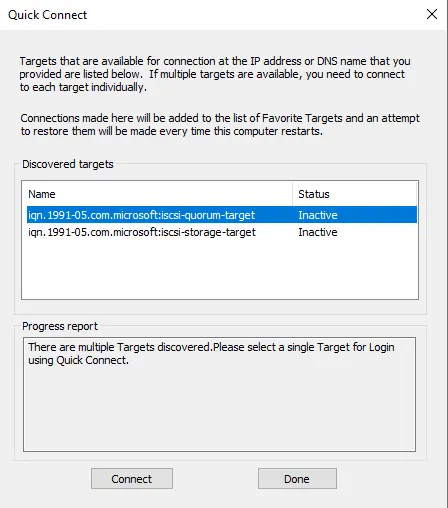
Two iSCSI discovered targets are found. You will notice the status shows inactive. Click on each one, and then click on Connect.
The status of the discovered targets of the iSCSI has been changed to connected.
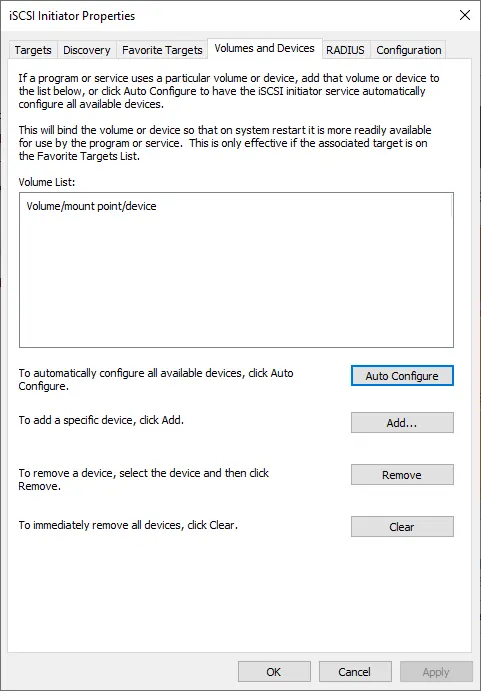
Now click on the Volumes and Devices tab, and then choose Auto Configure.
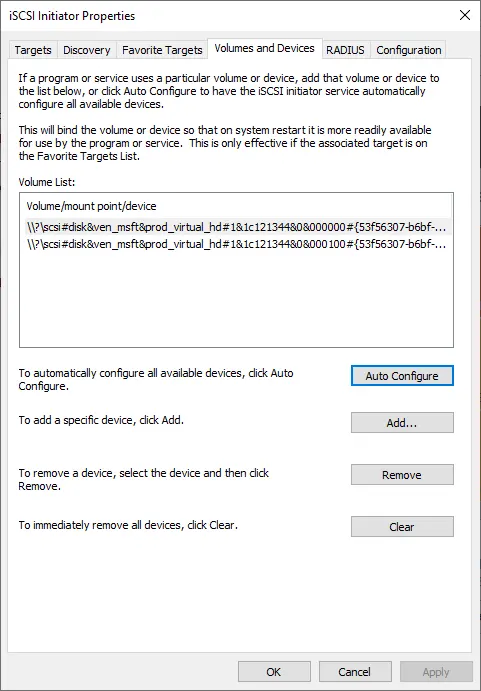
You can now see the volume list populated with the iSCSI volume targets.
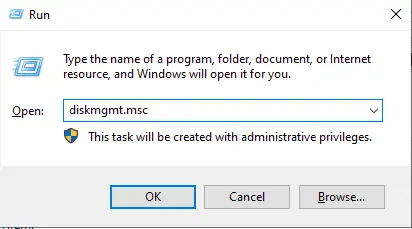
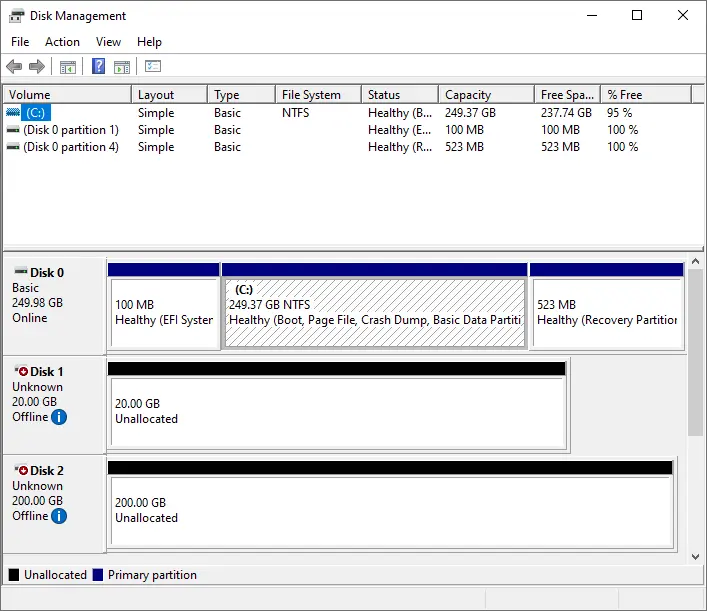
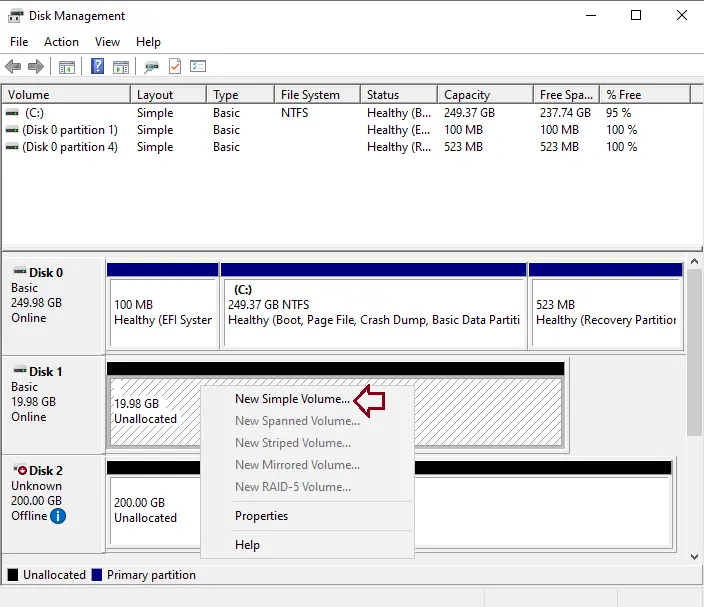
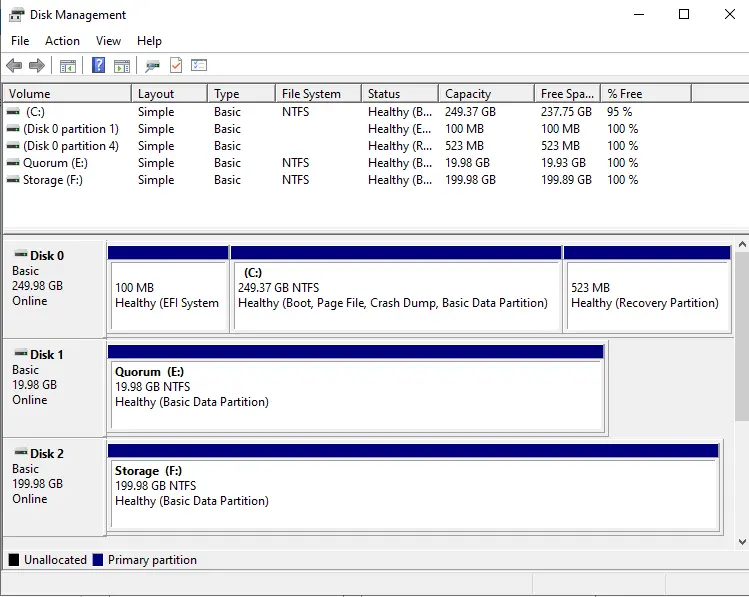
Open disk management by typing diskmgmt.msc in the run box.
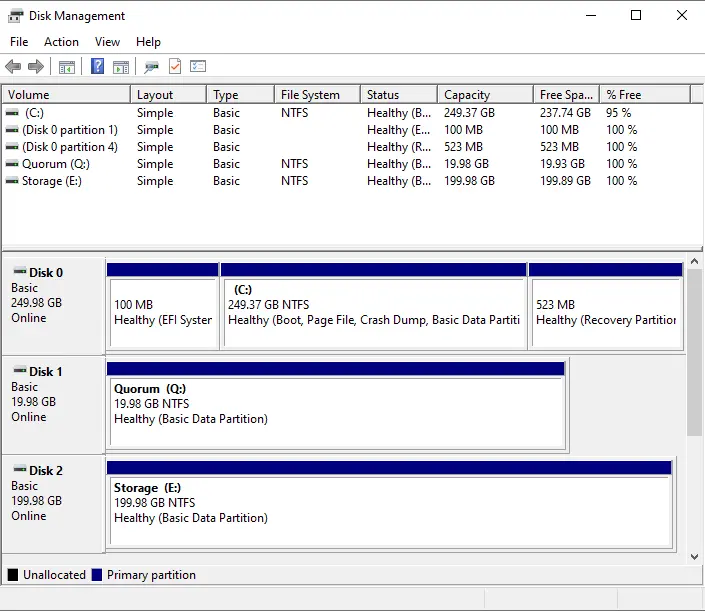
Create Quorum and Storage Disk
We can view the two disks showing up as unknown and offline. We need to bring them online.
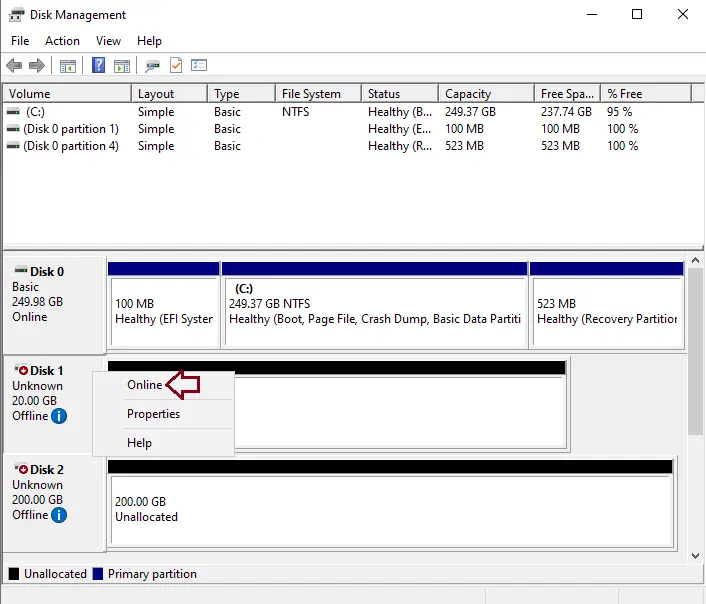
Right-click on disk 1, and then choose Online.
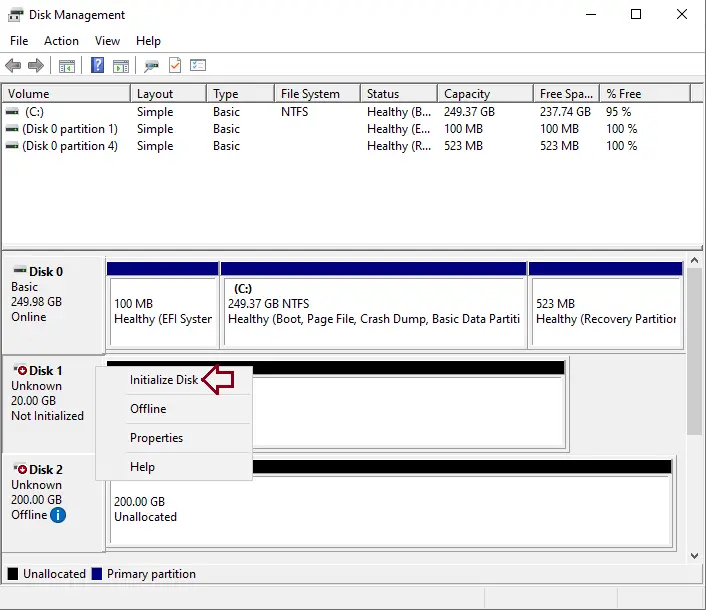
Right-click on disk 1 and then choose to initialize disk.
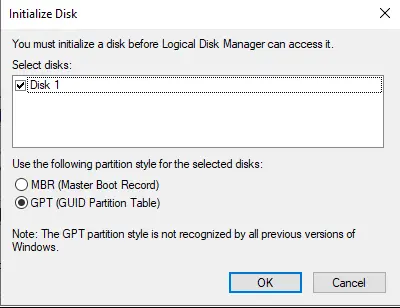
Initialize disk; click OK.
Right-click on unallocated disk 1 and then choose a new simple volume.
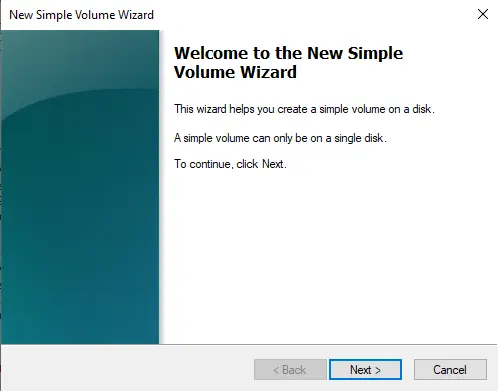
Welcome to the new simple volume wizard. Choose next.
Select next.

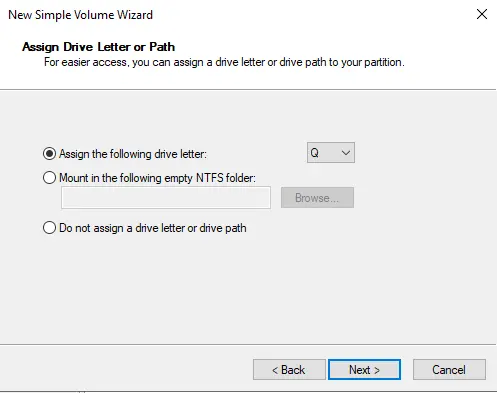
Assign a drive letter, and then choose next.
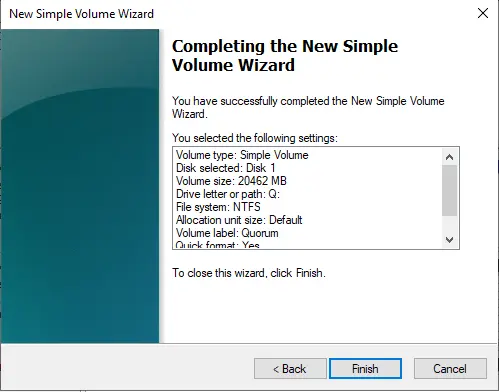
Enter a volume label, and then choose next.
Click finish.
Follow the above steps for storage disk configuration (Storage)
Once both disks are online and initializing, we can format, etc.
Now log in to your Hyper-V 2nd node (HyperV22-02) and then follow the above steps.
Open disk management, right-click on both disks, and then choose online.
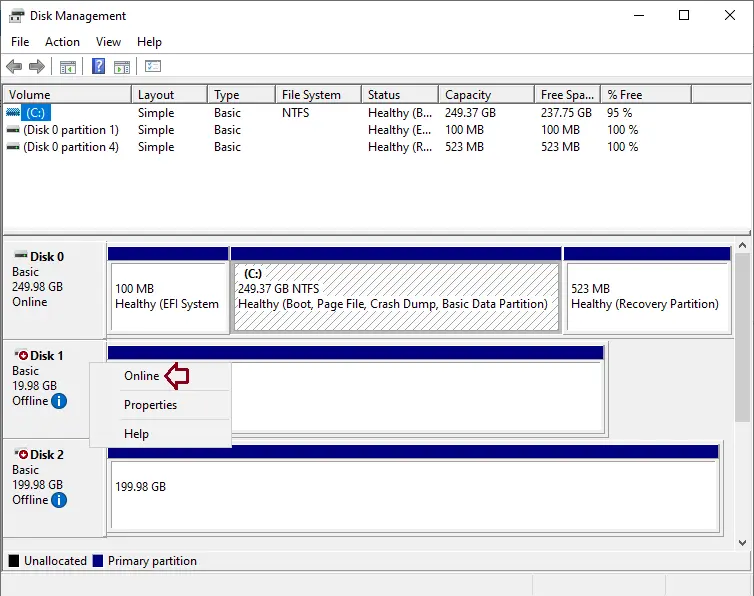
Right-click on disk 2, and then choose Online.
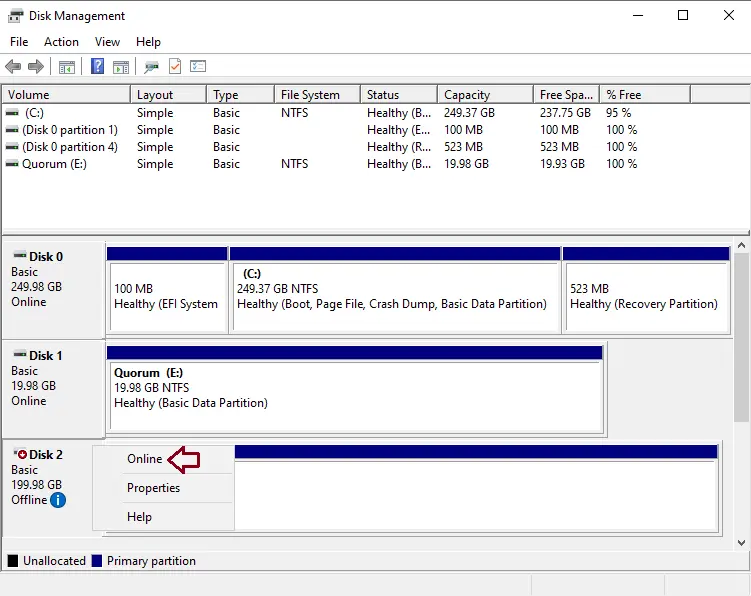
Here you can see that both disks (Storage and Quorum) are online.
In this first section, we have enabled the Hyper-V role, configured the network, and added shared storage to both nodes. In this section, we will discuss how to install failover clustering. How to create failover clustering using our two Windows Server 2022. Hyper-V nodes, clustered shared volumes (CSVs), and the Hyper-V virtual machine workload role are highly available.
How to Create Hyper-V High Availability Windows Server 2022
To create Hyper-V high availability, we will look at installing failover clustering. Creating Hyper-V high availability clusters, clustered shared volumes (CSVs).
Installing Failover Clustering Role
We need to enable the failover clustering feature on both servers (nodes) in our lab.
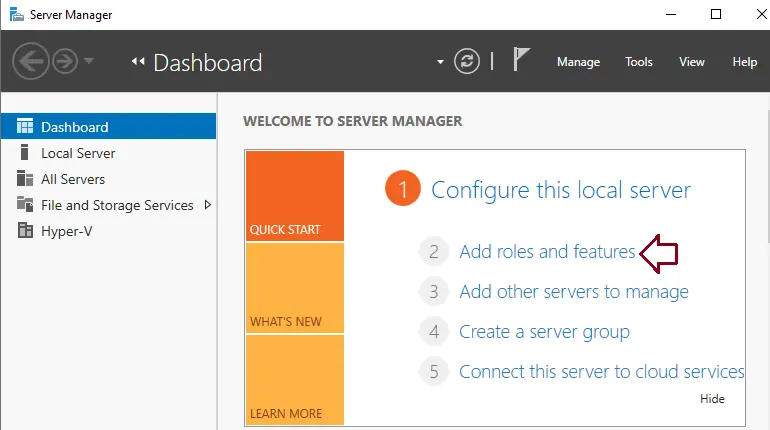
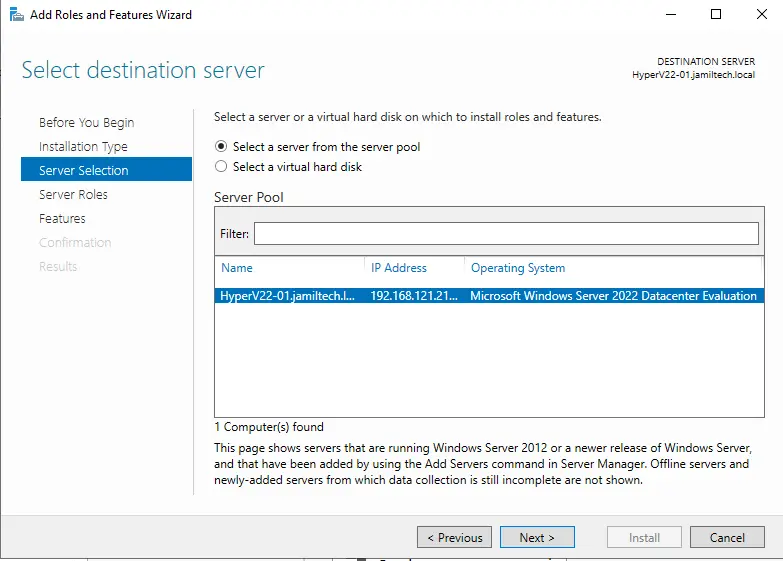
Log in to the first Hyper-V node (HyperV22-01), launch the server manager, and then click on the Add Roles and Features link.
Add roles and features wizard and choose next.
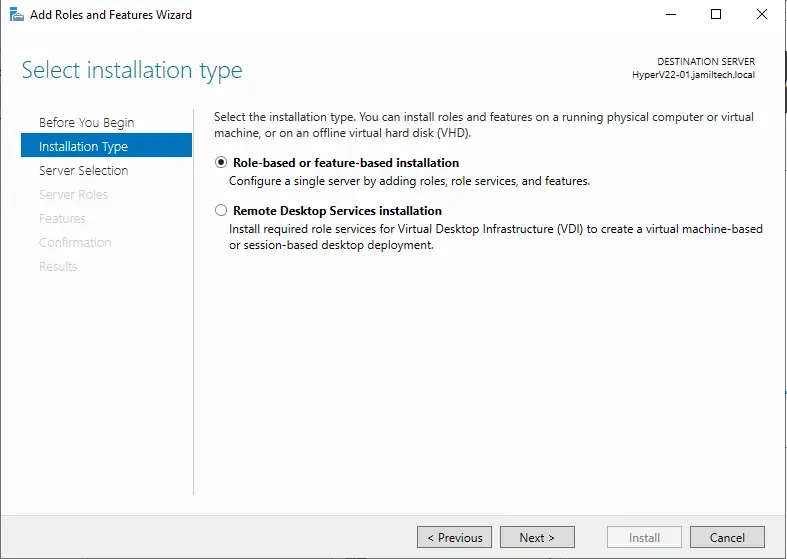
Role-based or feature-based installation, choose next.
Choose the host, and then click next.
Select next.

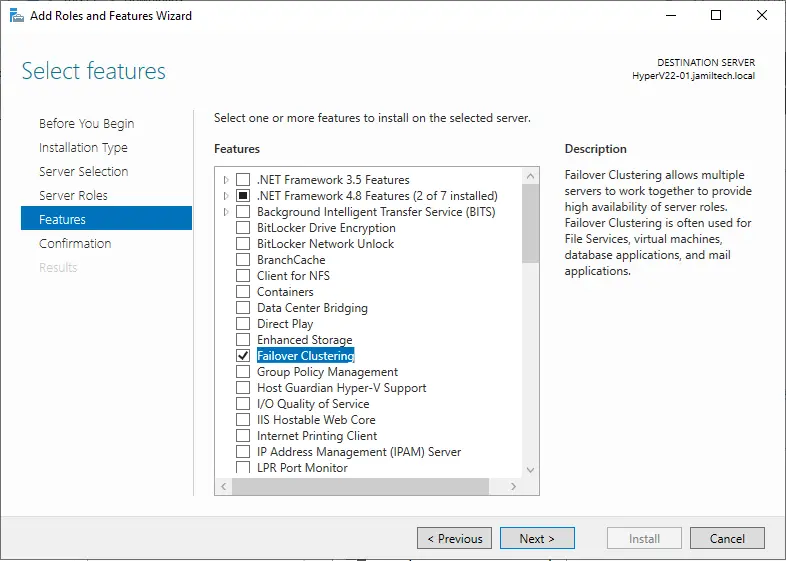
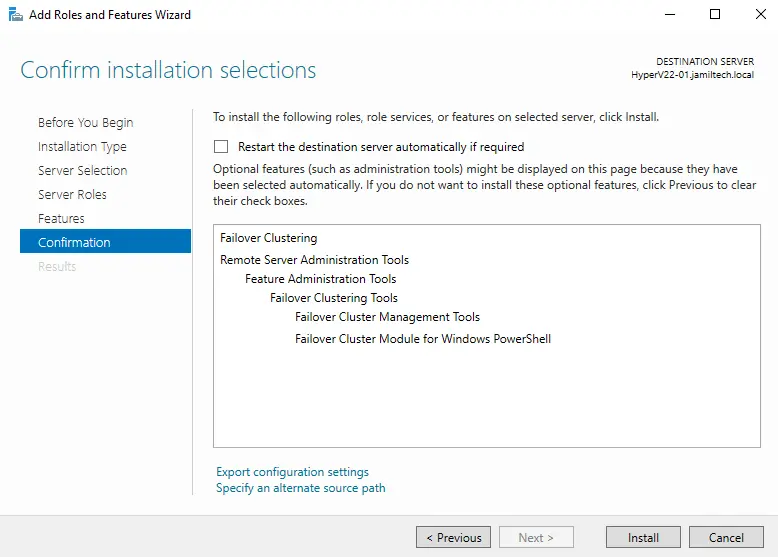
Tick the box for the failover clustering feature.
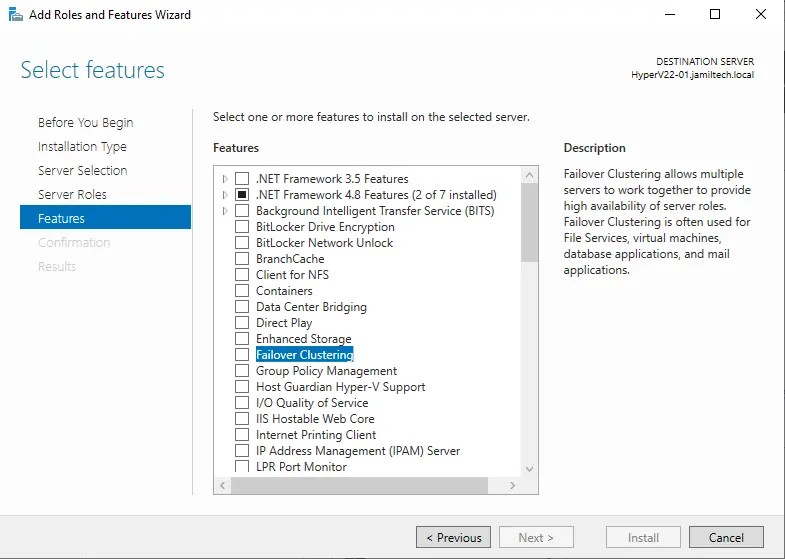
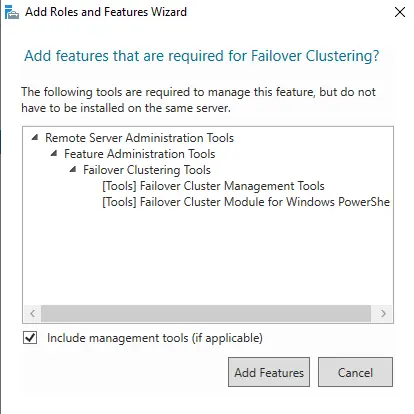
Click on Add Features to install the required features for Hyper-V Failover Clustering.
The failover clustering feature is now enabled; choose next.
Click on the install button.
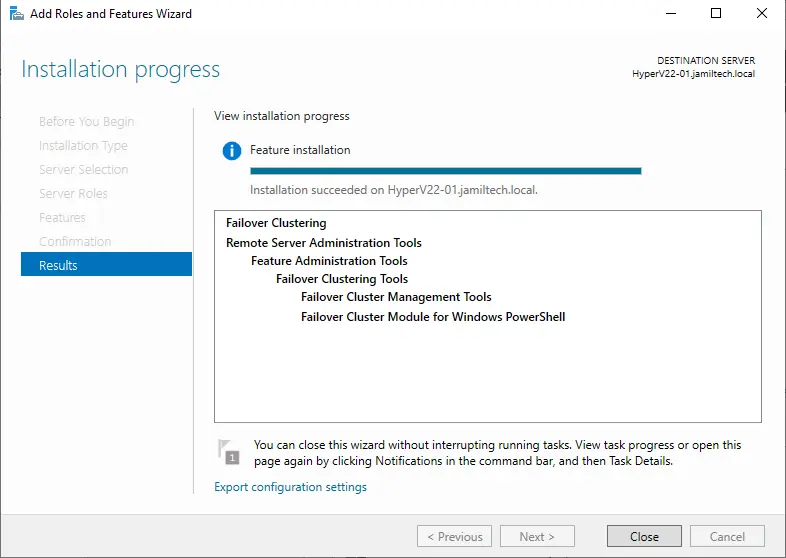
The failover clustering feature installation is complete; click close.
Follow the above steps to install failover clustering on the second Hyper-V node (HyperV22-02).
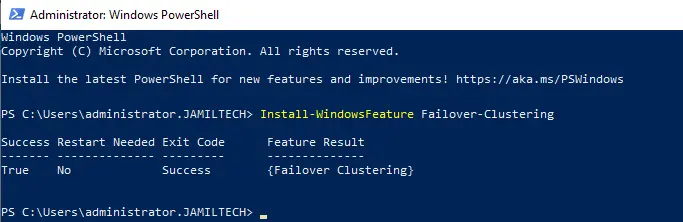
Install Failover Clustering Feature PowerShell
Open Windows PowerShell.
Type the Install-WindowsFeature Failover-Clustering PowerShell command and then press enter to install Failover Clustering.
Create Hyper-V Cluster High Availability
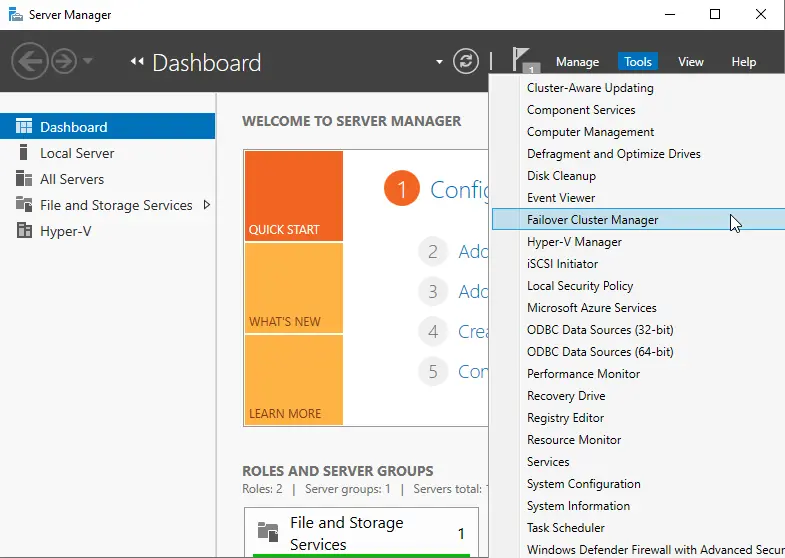
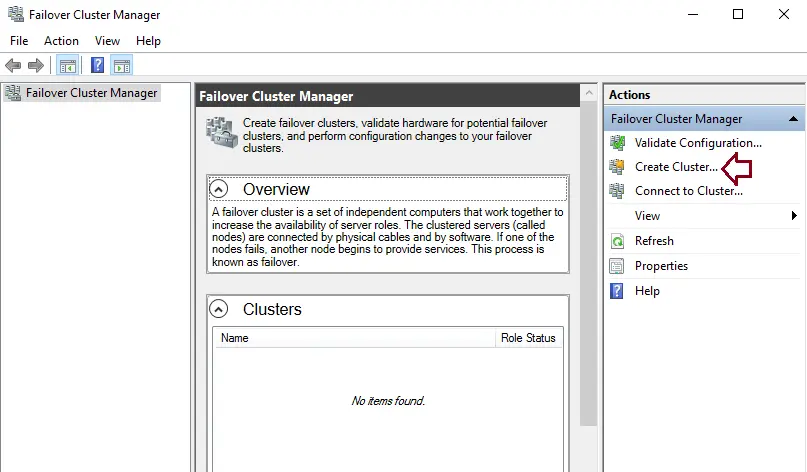
Select the Tools tab, and then click on the failover cluster manager.
Creating Failover Clustering: select Create Cluster under the action menu.
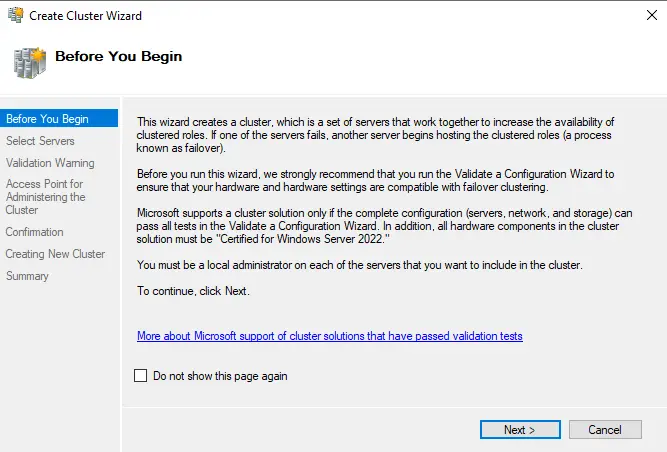
Create Cluster Wizard, and choose Next.
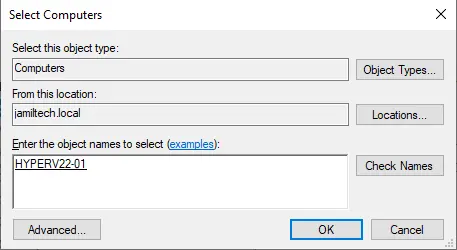
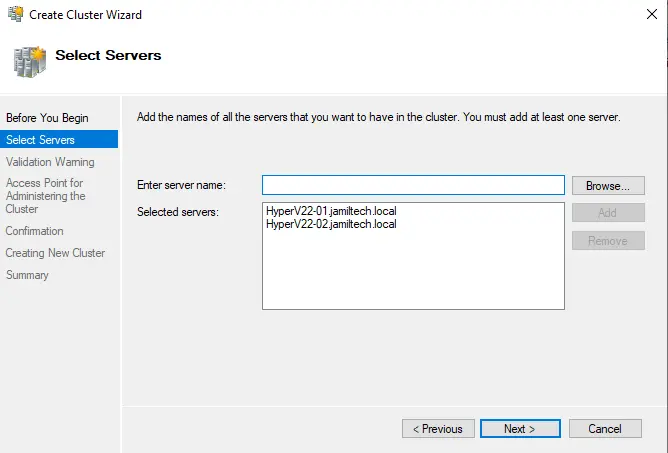
Select the Browse button.
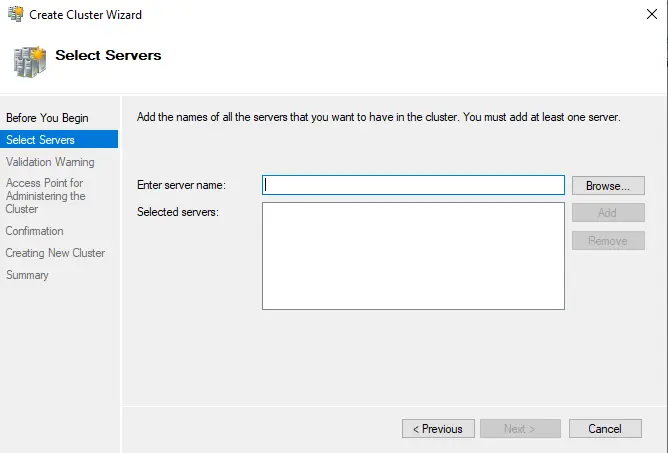
Type the Hyper-V cluster node name, and then click OK.
The Hyper-V servers were successfully added; click next.
Select next.
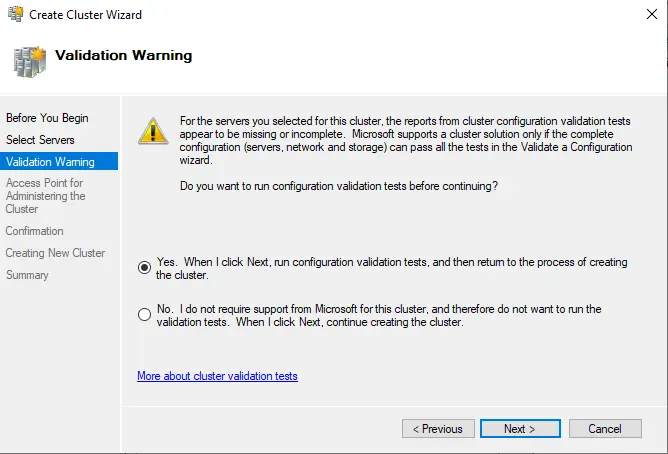
Validate a configuration wizard, and click next.
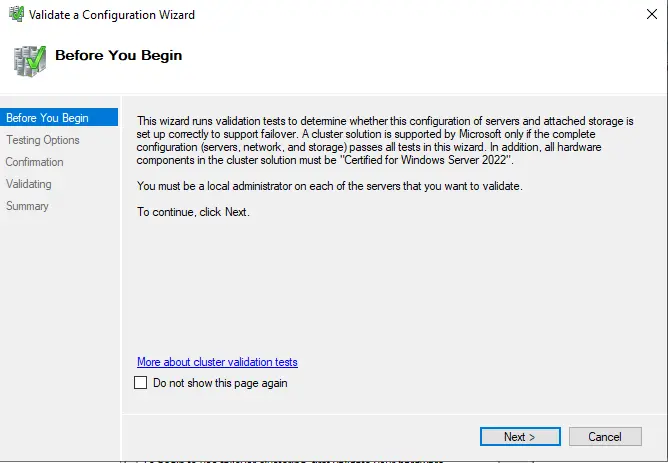
Click next.

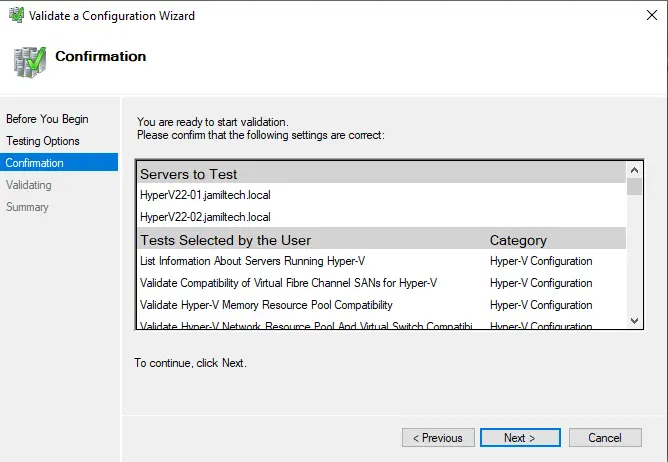
Select the Next button to start validation.
The validation tests are running.
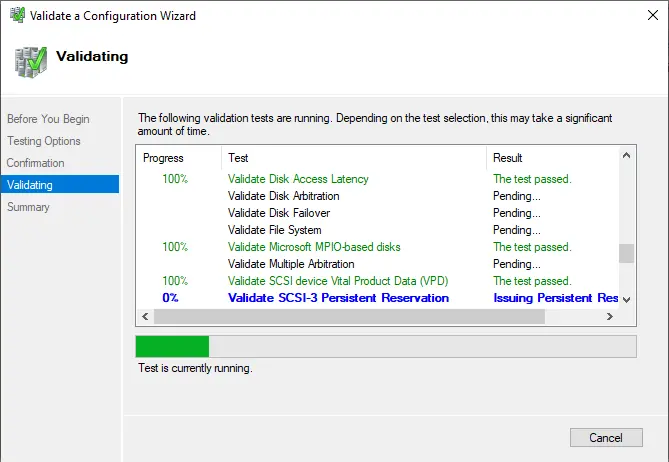
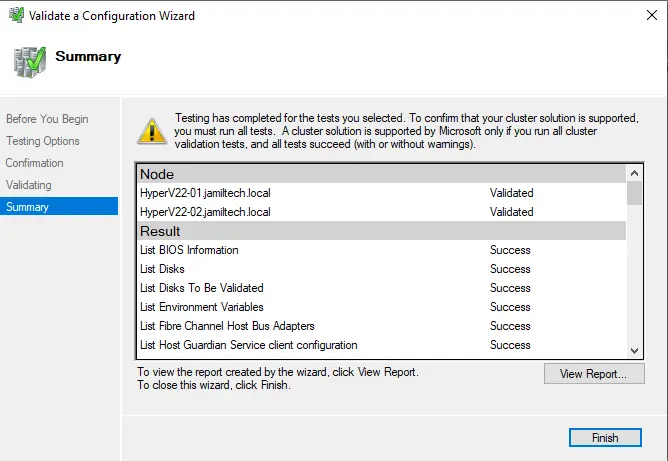
We can click on View Report to view the details of the test results in each area.
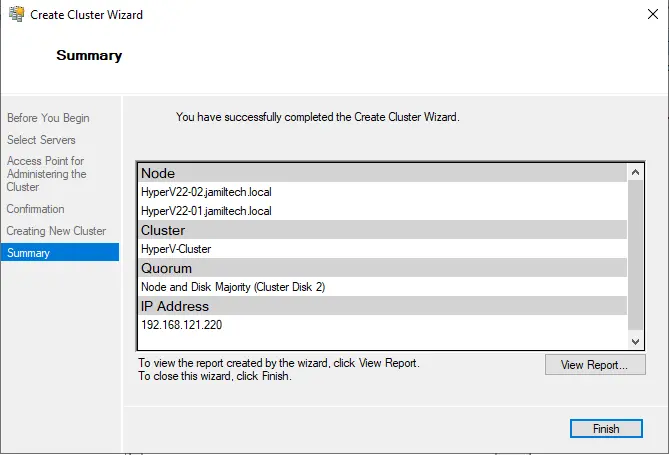
Click Finish
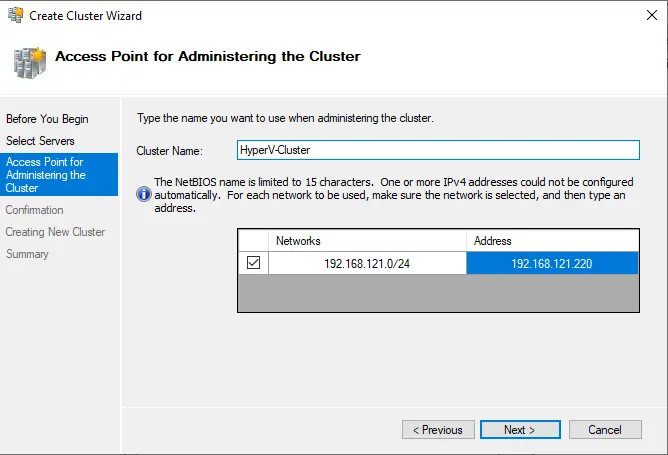
Enter a unique cluster name and cluster IP address, and then choose next.
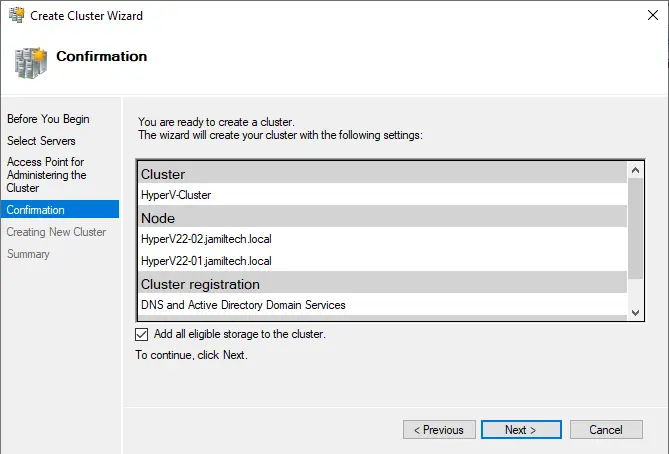
You can tick the box to add all eligible storage to the cluster, and then click next.
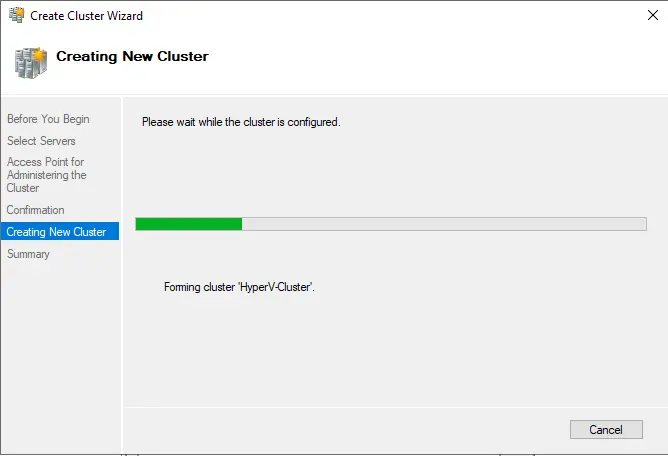
Creating a new cluster.
Click Finish.
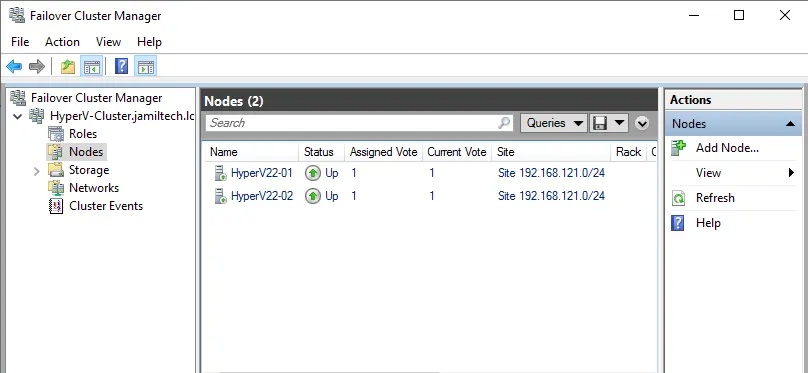
Open Failover Cluster Manager, and you can see two nodes are up and running.
Create Clustered Shared Volumes
We can simply create shared volumes in the Failover Cluster Manager. Click on the storage disks below our cluster; you can see cluster disks. One is for the witness disk named Quorum, and the second is marked as Available Storage.
Right-click on the available storage and then select Add to cluster shared volumes.
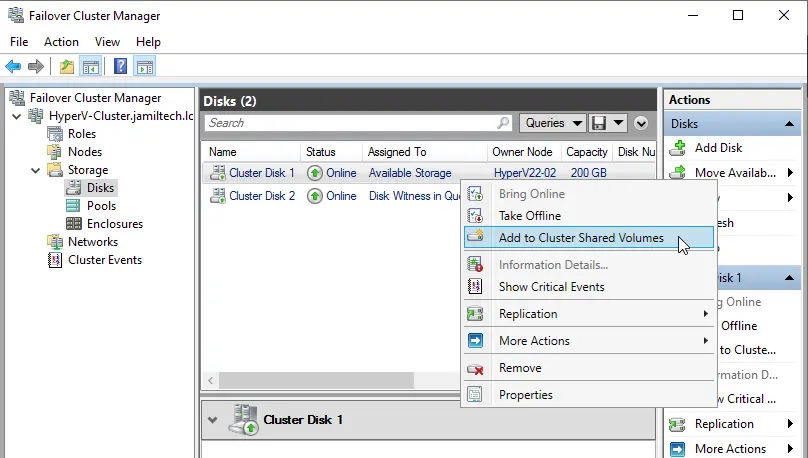
The Hyper-v Cluster Disk is changed to Cluster Shared Volume in the Assigned to Colum.

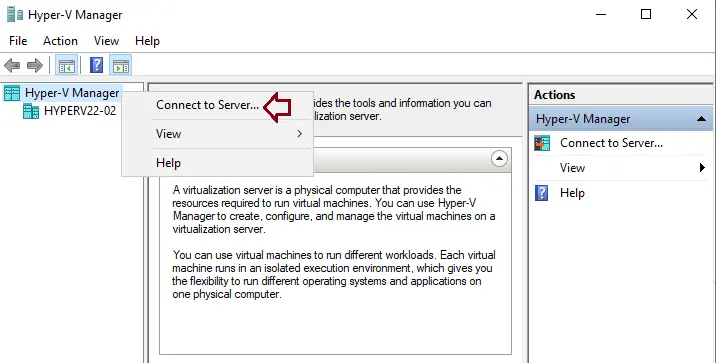
How to Connect to Second Cluster
In the Hyper-V Manager, right-click on Hyper-V Manager and then choose to connect to server.
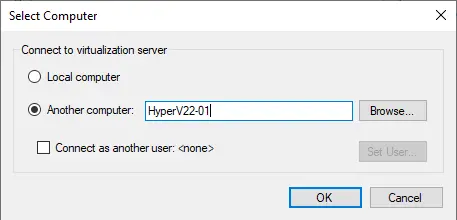
Enter your Hyper-V node name, and then choose OK.
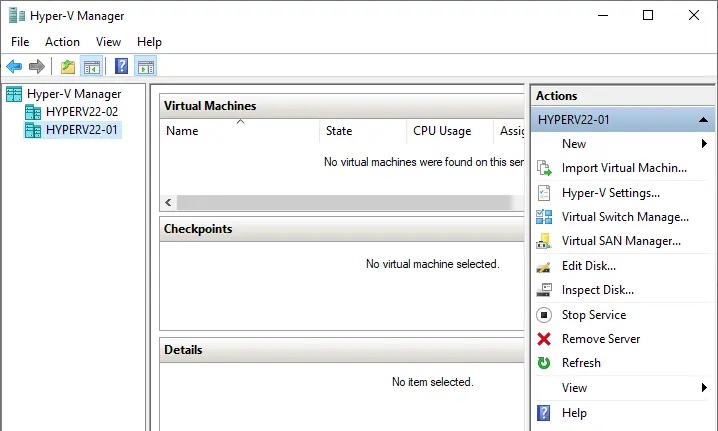
You can see both hyper-v nodes are available.
How to Change Hyper-V Storage Settings
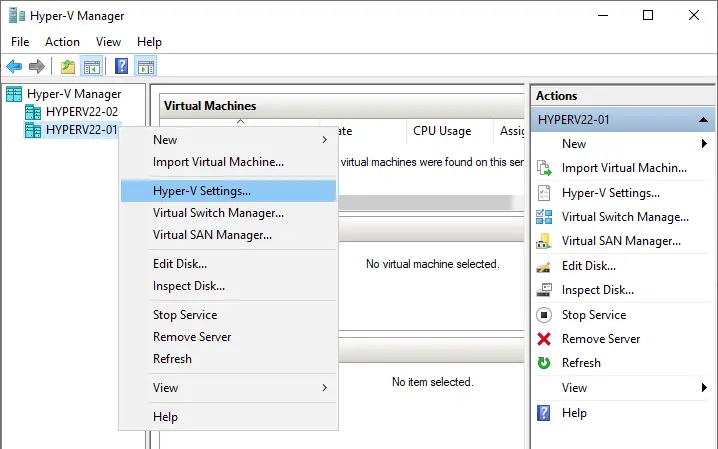
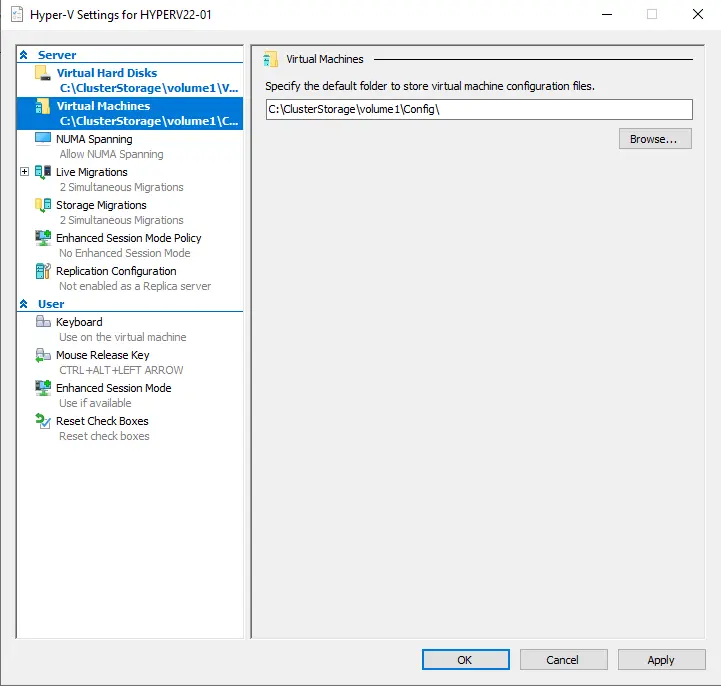
Once the clustered shared volume is configured,. We can change the Hyper-V settings on each host (Hyper-V) to use our CSV as the default location for storing the virtual machines. Right-click on one node, and then choose Hyper-V Settings for each host.
Change the “Virtual Hard Disks location” and “Virtual Machines location” to the cluster shared volume, which is C:\ClusterStorage\volume1 on the Hyper-V hosts.
Open your cluster storage.

Visit NAKIVO to learn more about Hyper-V Clustering

