
If you’re looking to get Chromebook-like features on your computer or Mac device, installing CloudReady is a great solution. CloudReady, based on Chromium OS, is an open-source operating system that brings the experience of Chrome OS to your existing hardware. This guide will walk you through the process of creating a CloudReady USB installer, which you can use to install CloudReady on your device.
Prerequisites for Creating a CloudReady USB Installer
Before you begin, make sure you have the following:
- Chrome browser installed on your computer.
- CloudReady Bin Image file.
Table of Contents
The CloudReady USB Maker is the tool for creating a CloudReady USB installer.
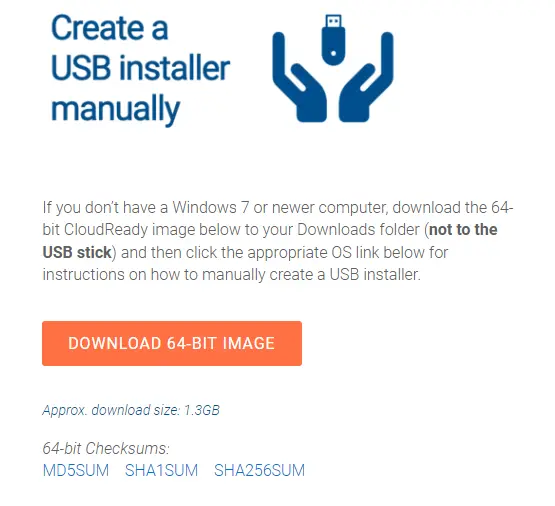
Step 1: Download the CloudReady Bin File
- Visit the Official Neverware Website: Start by navigating to the official Neverware website.
- Download the Bin File: Click on the download link for the 64-bit image to get the zip folder containing the CloudReady .bin file.
Step 2: Install the Chromebook Recovery Utility
To create a CloudReady USB installer, you’ll need the Chromebook Recovery Utility extension in your Chrome browser.
- Install the Extension: Go to the Chrome Web Store and search for “Chromebook Recovery Utility.” Click on Add to Chrome to install it.
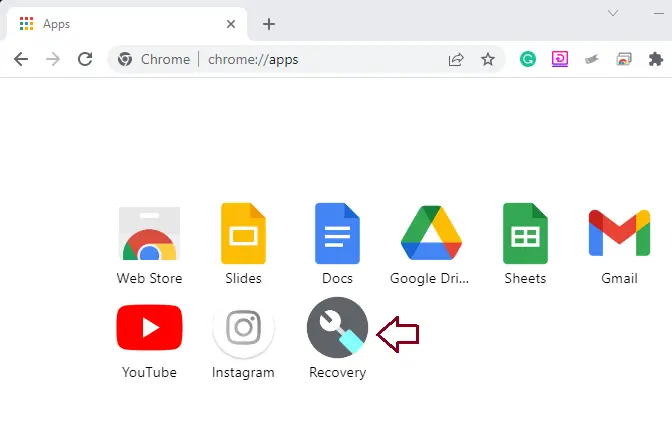
- Access the Chrome Apps: After installation, the Chrome Apps tab should automatically open. If it doesn’t, enter chrome://apps in the address bar and press Enter.
Create Cloudready Bootable USB Drive
Once you have the Chrome bin file, get a USB drive. The method here is to create a CloudReady USB Installer that is applicable for all platforms, such as Windows, Linux, macOS, FreeBSD, and others. The only thing you should have is the Chrome browser.

Once it is installed, the Chrome Apps tab automatically opens. If not, then enter chrome://apps in the address bar and then press the enter key.
Step 3: Create a CloudReady USB Installer
With the Chromebook Recovery Utility installed, you’re ready to create your USB installer.
1. Format the USB Drive
- Ensure your USB drive is formatted before proceeding. It should have at least 8 GB of space.
2. Create the Installer
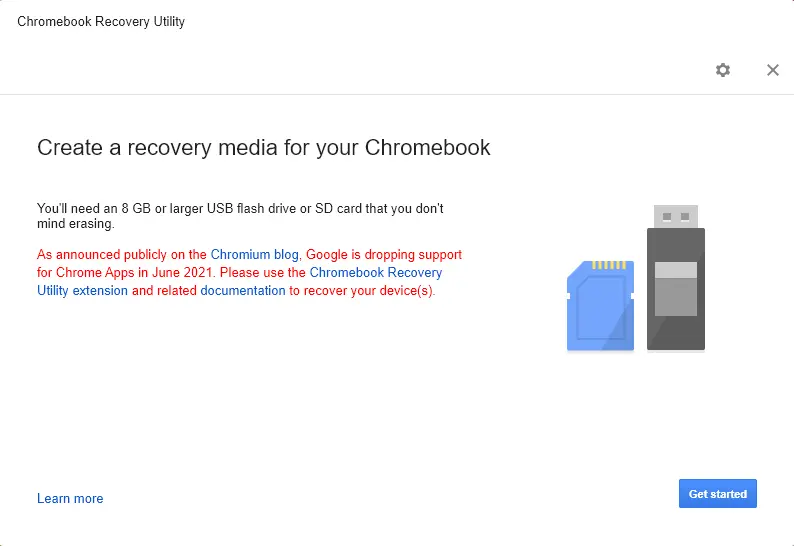
- Launch Chromebook Recovery Utility: Open the Chromebook Recovery Utility from your Chrome Apps.
- Get Started: Click on Get Started on the “Create a recovery media for your Chromebook” page.
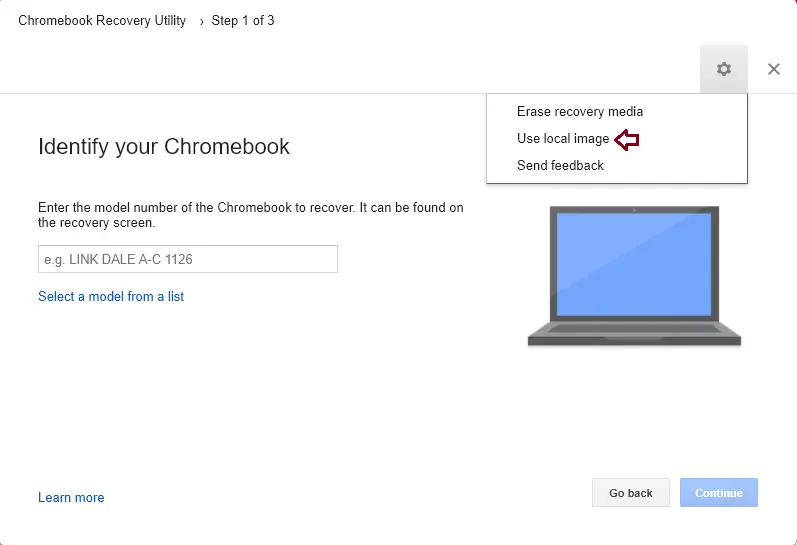
- Use Local Image: On the “Identify your Chromebook” page, select the recovery utility setting icon and choose Use Local Image.
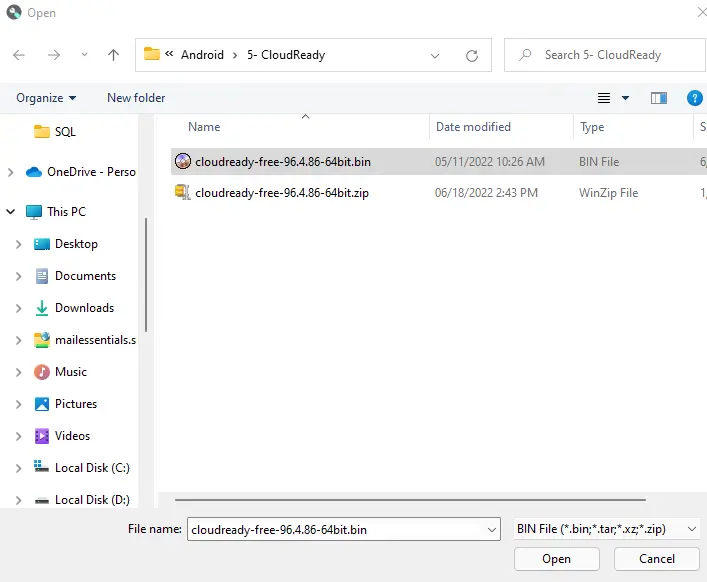
- Browse for the Bin File: Navigate to the location where you downloaded the CloudReady .bin file, select it, and click Open.
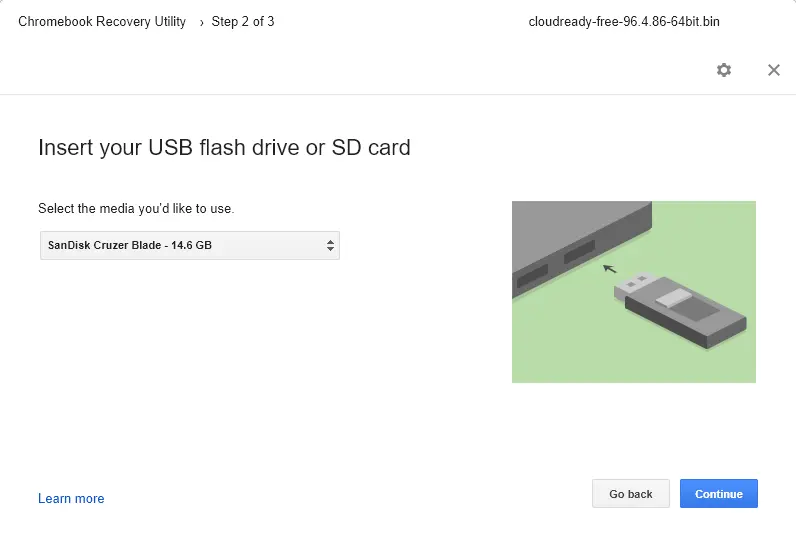
- Select Your USB Drive: Verify the USB drive and click Continue.
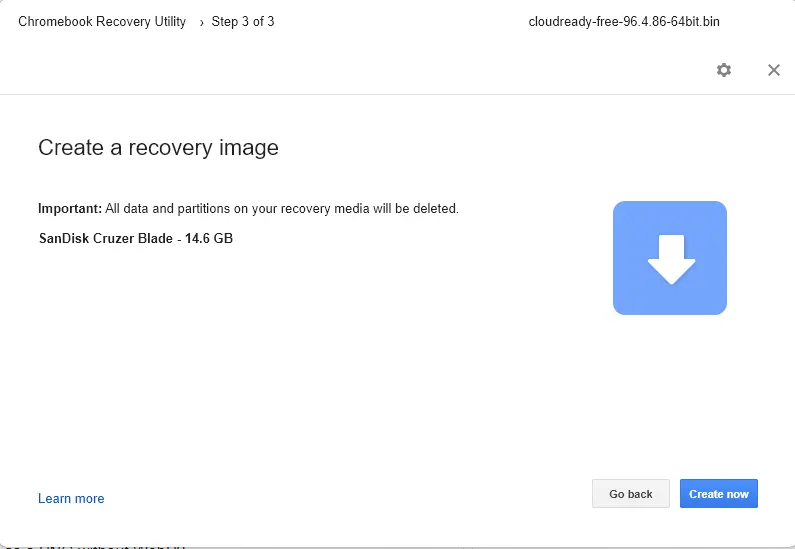
- Create the Recovery Image: Click Create Now to start the process. The utility will begin creating the CloudReady USB installer.
3. Completion
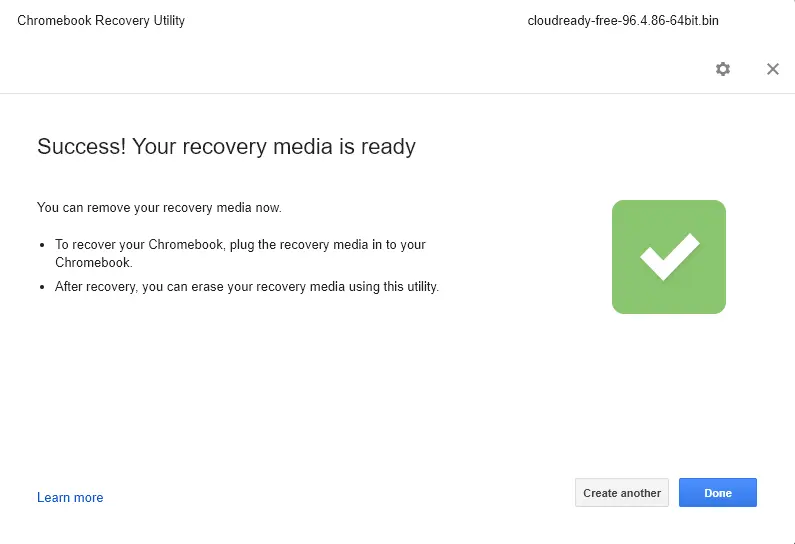
- Once the process is complete, remove the USB drive from your computer. Your CloudReady USB installer is now ready for use.
Identify your Chromebook page, select the recovery utility setting icon, and then choose to use local image.
Browse for CloudReady bin Image and choose the cloudready-free.bin.zip file from the downloads directory.
Verify your USB drive, and then click Continue.
Ready to create a recovery image Chromebook, Click create now
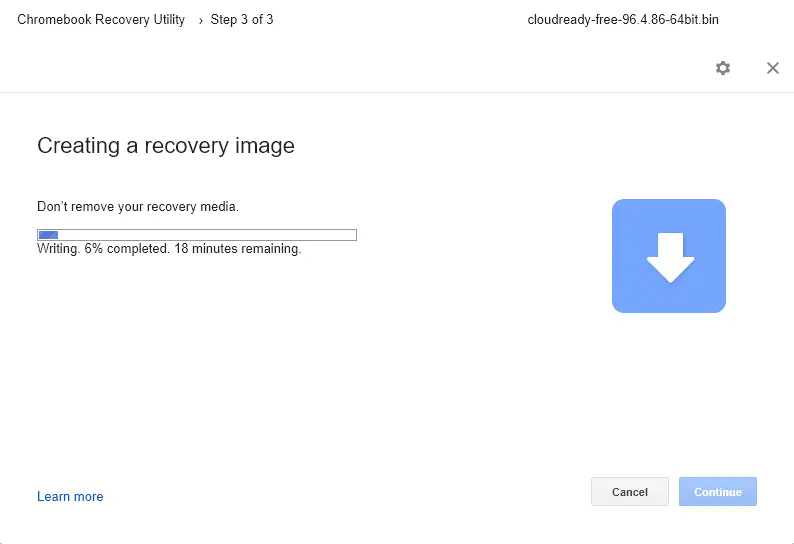
Creating a CloudReady USB installer is in progress.
When the recovery installer is done, remove the USB disk from your computer.
Now the USB CloudReady installer is ready to use.
Step 4: Creating a CloudReady USB Installer Using CloudReady USB Maker
Alternatively, you can use the CloudReady USB Maker tool provided by Neverware to create the USB installer.
- Download the CloudReady USB Maker: Visit the Neverware website and download the latest version of the CloudReady USB Maker tool.
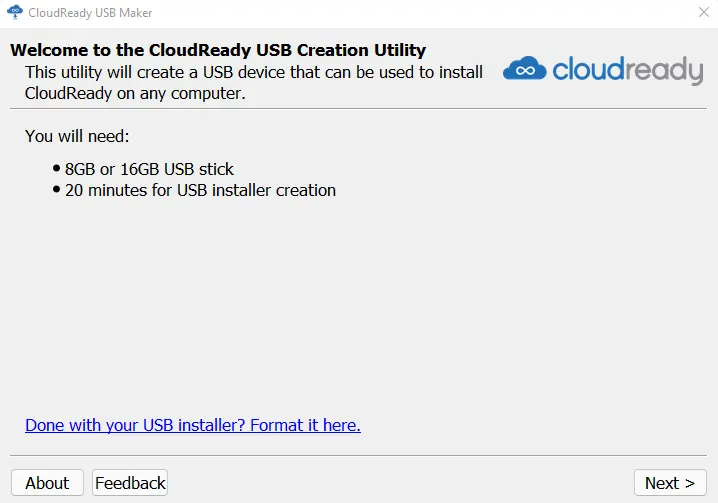
- Run the USB Maker: Double-click the downloaded file to run the CloudReady USB Maker.
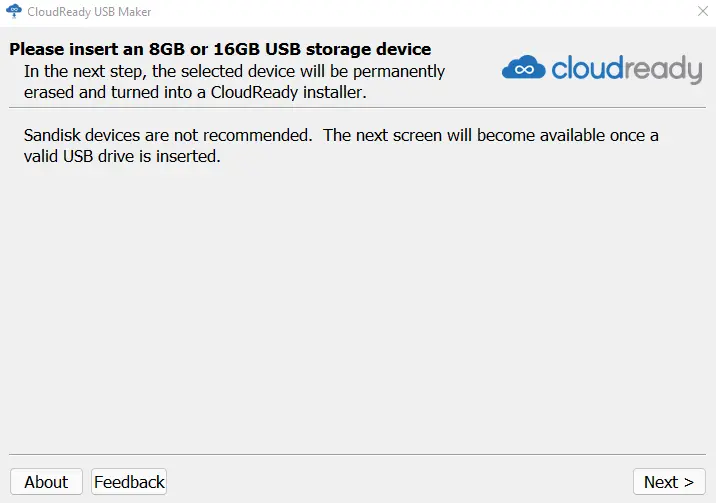
- Insert a USB Drive: Insert a flash drive with at least 8 GB of storage into your computer.
- Create the Installer:
- Welcome Page: On the welcome page, click Next.
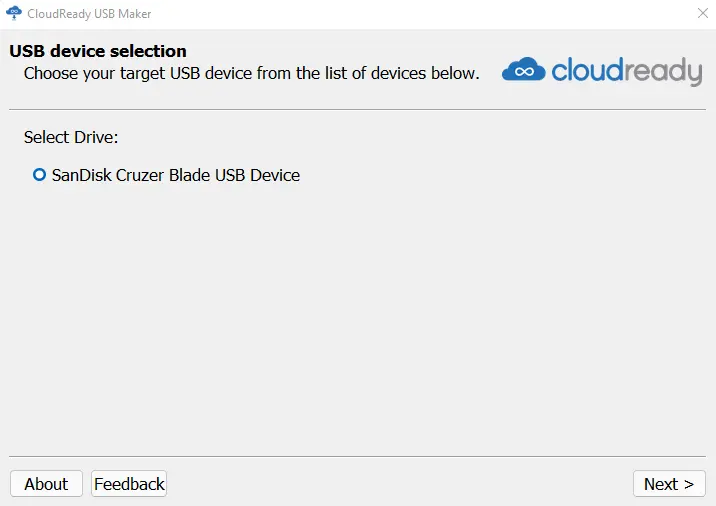
- USB Device Selection: Select the target USB drive that will be used as the CloudReady installation device, then click Next.
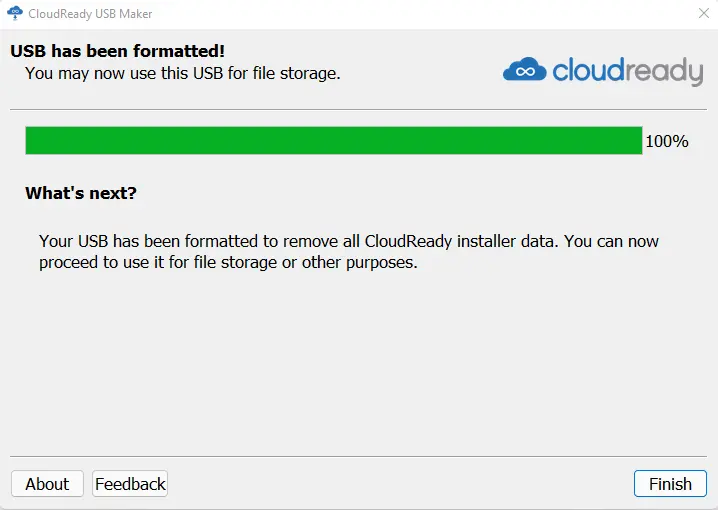
- Finish: The CloudReady USB installer will be created. Once done, click Finish.
Now, your CloudReady USB installer is ready to be used for installing CloudReady OS on your device.
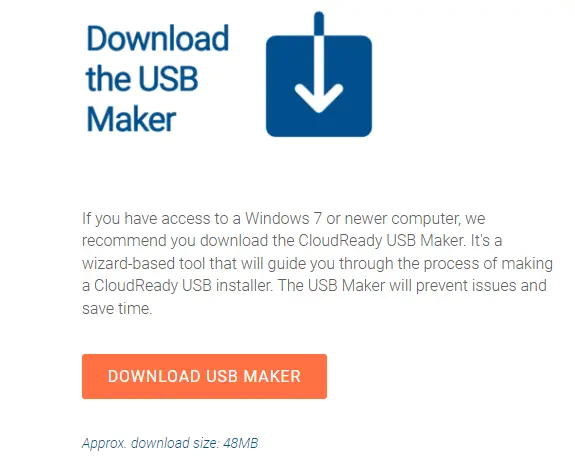
You need to download the latest version of the CloudReady USB Maker.
Now download the CloudReady image
Double-click to run the cloudready USB maker installer.
Welcome to the CloudReady USB creation page. Insert a flash drive with at least 8 GB, and then choose next.
Click Next
USB device selection, select the target USB disk used as your CloudReady installation device, and then choose next.
The CloudReady USB installer was created successfully; choose the finish.
Conclusion
By following these steps, you can easily create a CloudReady USB installer to bring Chrome OS-like features to your computer or Mac. Whether you choose the Chromebook Recovery Utility or the CloudReady USB Maker, both methods will provide you with a functional installer to transform your existing hardware into a CloudReady-powered device.
