In this article, we will learn how to configure email forwarding in Exchange using GUI in Exchange Server 2019 for a mailbox. Configure email forwarding for a user mailbox. As an Exchange administrator, you may need to set up email forwarding for a user’s mailbox based on the requirements.
For instance, if an employee recently left your organization or has gone on leave, and you wish his email to be forwarded to his manager or other employees,. You can configure a forward using the Exchange Admin Center. You can either use the Exchange Management Shell to set up email forwarding. First, you need to be assigned permissions before you can achieve this procedure. See what type of permissions you need and learn more about them.
Table of Contents
Configure Email Forwarding in Exchange using GUI for a Mailbox via Exchange Admin Center
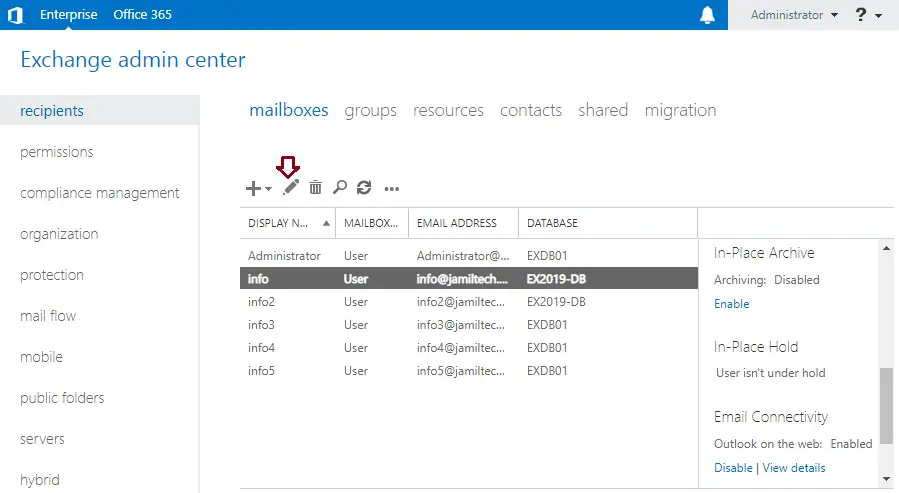
Log in to the Exchange admin center, In the Exchange Admin Center, go to the Recipients settings, and then click on the Mailboxes tab. From the list of user mailboxes, highlight the user that you wish to configure mail forwarding for, and then click on the Edit icon. In the below steps, we will see how to forward all emails sent to the mailbox of info to another user, info2.
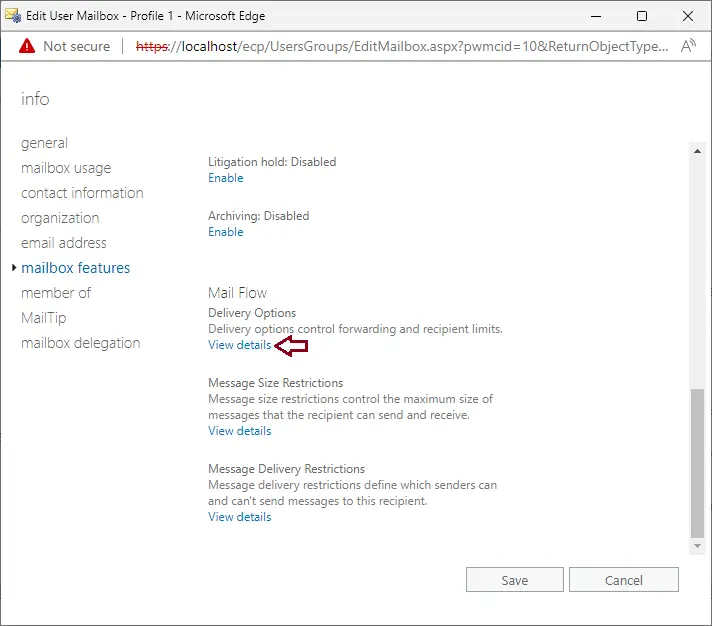
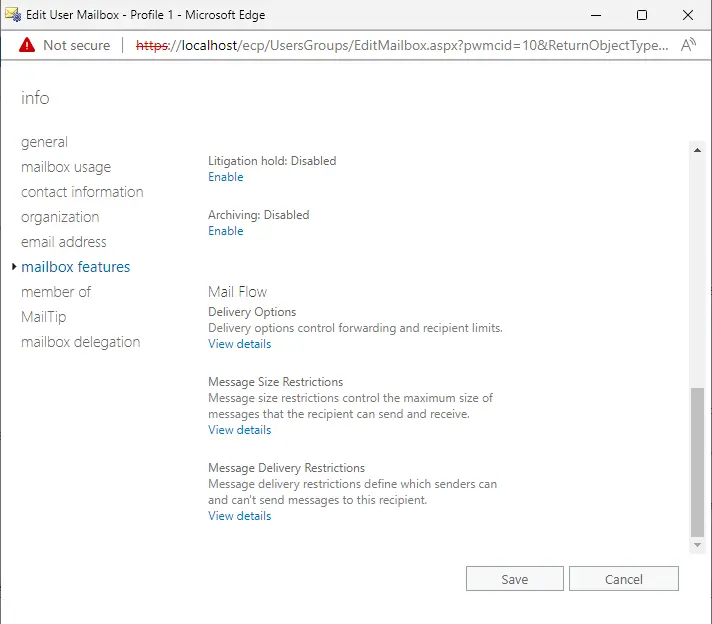
On the mailbox properties window, select the Mailbox Features option. Under Mail Flow settings, click on View details to change or view the setting for forwarding email messages.
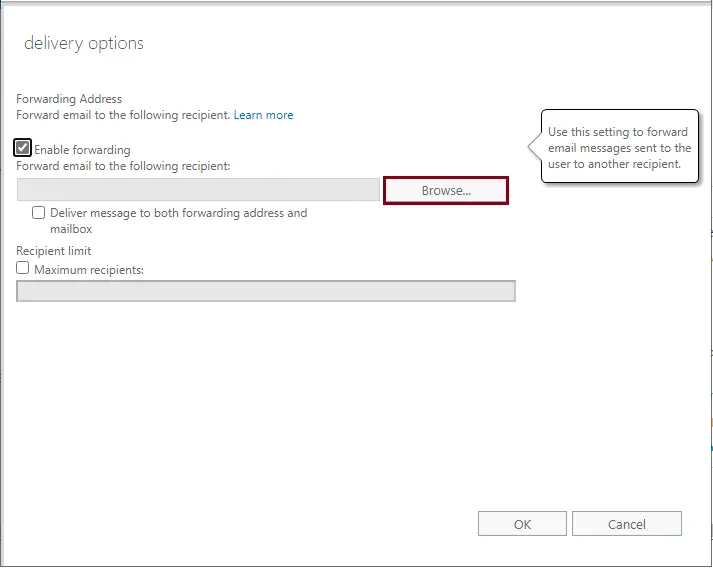
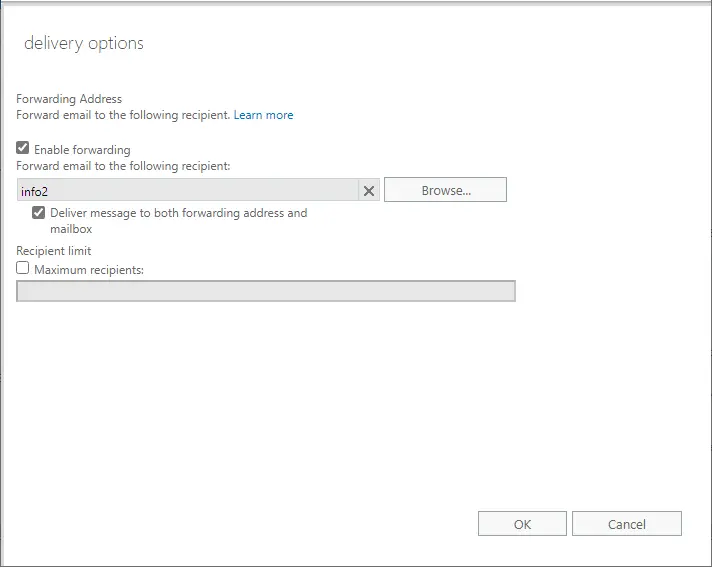
Tick the Enable forwarding check box, and then click on the Browse button.
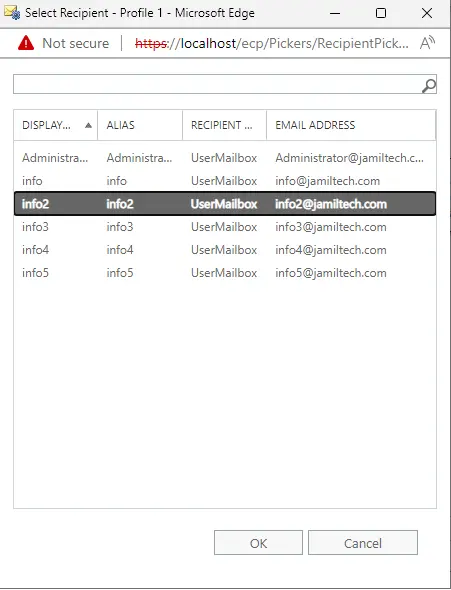
Select Recipient Email
On the Select Recipient interface, select a user you need to forward all emails to, and then click OK.
Note: Choose the “Deliver message to both forwarding address and mailbox” checkbox if you need both the recipient’s and the forwarding user’s addresses to get copies of the emails sent. Click Save
Choose the save button, and then you can test sending emails.
Refer to this article to learn more about email forwarding in Exchange Server 2019.


