Dynamic Distribution Groups in Microsoft Exchange 2019 are powerful tools that allow administrators to send emails to a specific set of recipients based on certain criteria. Unlike static distribution groups, where members are manually added, dynamic distribution groups automatically include members based on filters or rules. This guide will walk you through the steps to create a dynamic distribution group named “Designers” for users in a specific organizational unit (OU).
What is a Dynamic Distribution Group?
A Dynamic Distribution Group is a mail-enabled Active Directory group that is dynamically updated to include members based on specific attributes or criteria. This is especially useful in large organizations where user memberships might frequently change, as it ensures the group always contains the right members without manual updates.
Step 1: Access the Exchange Admin Center
- Log in to Exchange Admin Center (EAC): Open your web browser and navigate to the Exchange Admin Center using the URL specific to your organization.
- Navigate to Recipients: In the EAC, go to the Recipients section, and then click on the Groups tab.
Step 2: Create the Dynamic Distribution Group
Create New Group: Click on the + icon and select Dynamic Distribution Group from the dropdown menu.
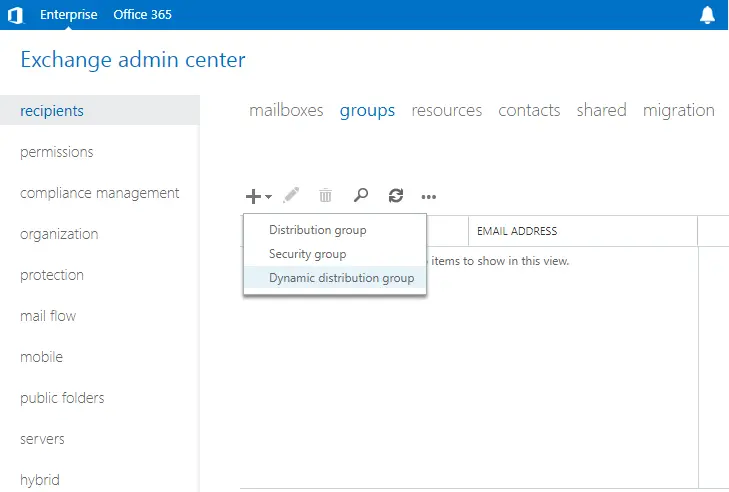
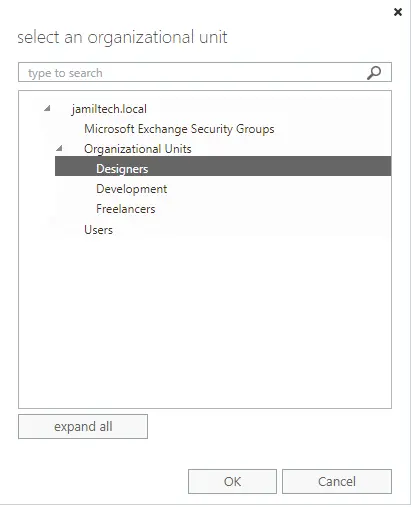
Specify a “display name” and “alias” for the “dynamic distribution group”. Select the Browse button to select the organizational unit (OU).
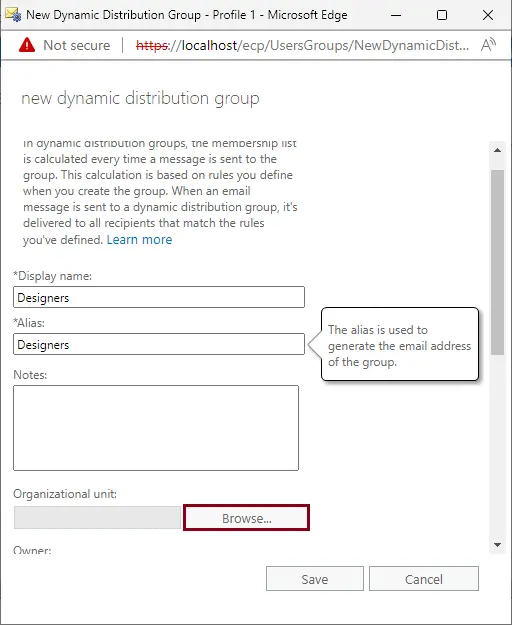
In this instance, I have selected the designer’s organizational unit. If you have not specified the OU to store the group, the dynamic distribution group will be created in the default Users.
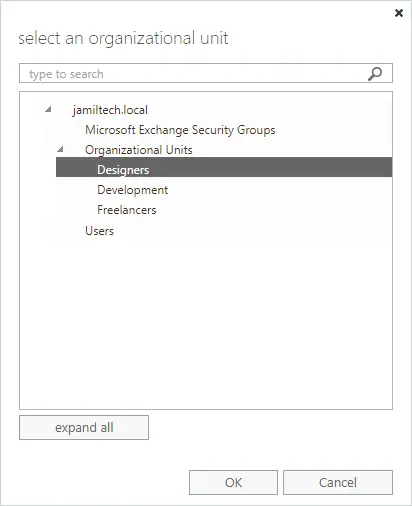
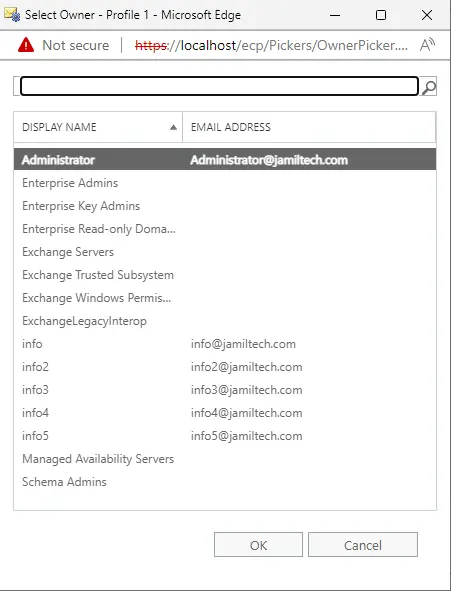
An owner option for a “dynamic distribution group” is optional. We can select owners by clicking the Browse button.
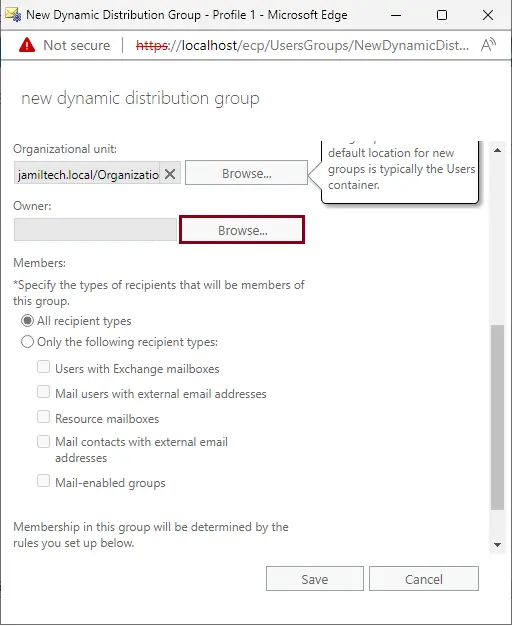
We will choose “administrator account” as the owner of the dynamic distribution group.
Step 3: Configure the Dynamic Distribution Group
- Display Name and Alias:
- Display Name: Enter a display name for the group. For example, “Designers”.
- Alias: Enter an alias for the group. This will form the email address for the group, such as [email protected].
- Select Organizational Unit (OU):
- Click on the Browse button to select the OU where this dynamic distribution group will be stored.
- In this example, select the “Designers” OU. If you do not specify an OU, the group will be created in the default “Users” container.
- Specify Group Owner (Optional):
- You can assign an owner to the group by clicking the Browse button and selecting a user.
- For this example, select the “Administrator Account” as the owner.
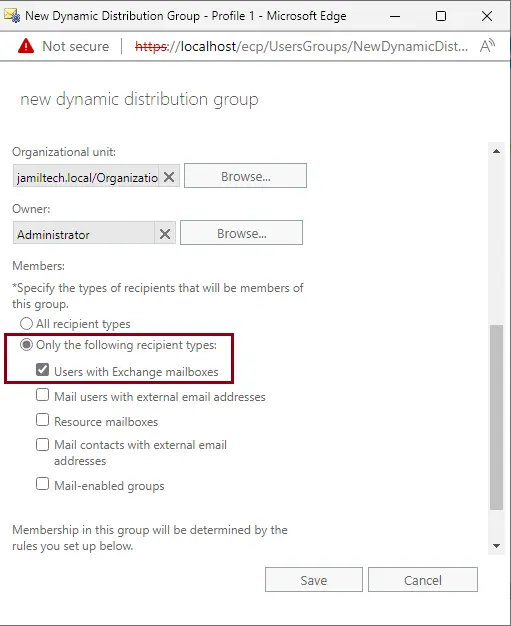
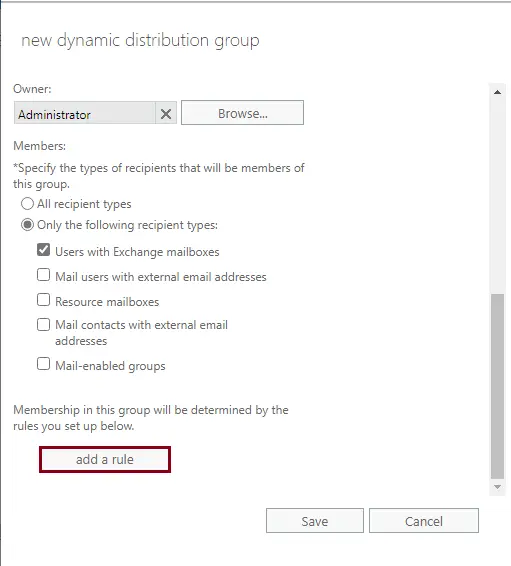
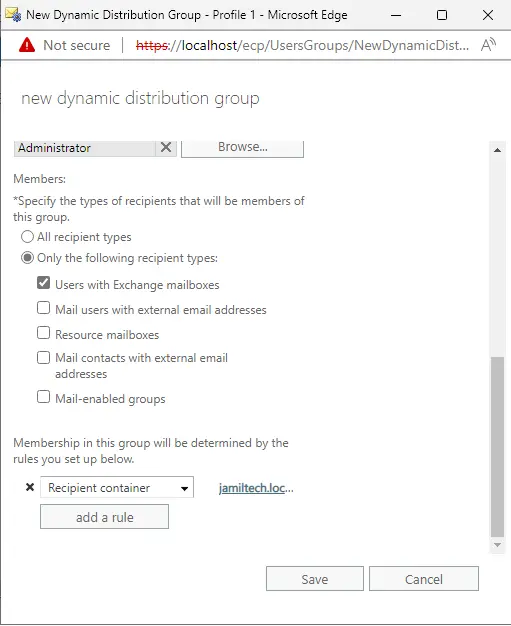
Choose “Add a Rule” to define the criteria for membership in this dynamic distribution group.
Step 4: Define Membership Criteria
- Recipient Types:
- In the Only the following recipient types section, check the Users with Exchange mailboxes option to include users who have Exchange mailboxes in the dynamic distribution group.
- Add a Rule:
- Click on Add a Rule to define the criteria for membership in this group.
- Choose Recipient container from the dropdown menu.
- Select the Designers (OU) from the list, and then click OK.
- Save the Group:
Once all configurations are set, click on the Save button to create the new dynamic distribution group.
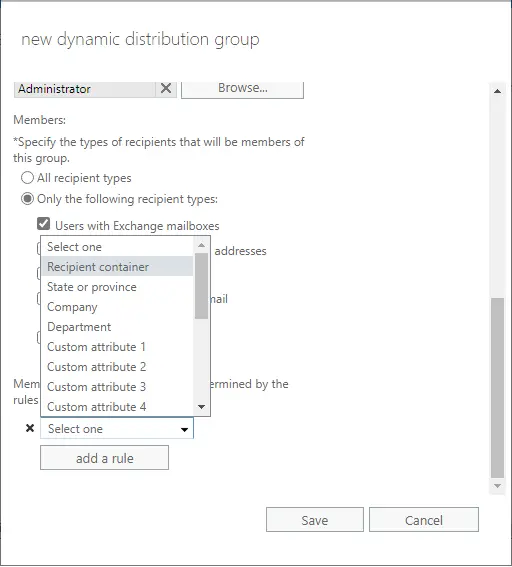
Select designers (OU) from the list, and then click OK.
Choose the Save button to create a new dynamic distribution group.
Now you can verify the new dynamic distribution group.
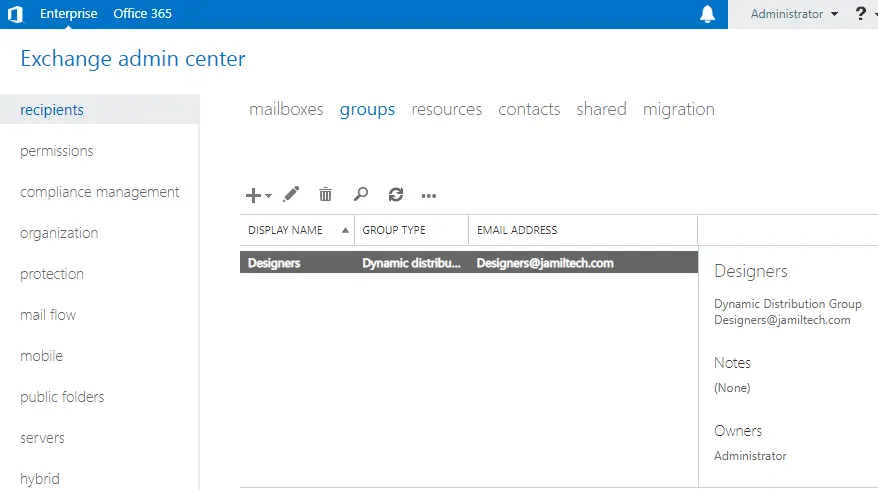
Step 5: Verify the Dynamic Distribution Group
- Check Group in EAC:
- After saving, you can verify the newly created group by going to the Groups tab in the EAC and ensuring “Designers” appears in the list.
Step 6: Retrieve Dynamic Distribution Groups Using PowerShell
- Open Exchange Management Shell: Open the Exchange Management Shell to manage Exchange Server via PowerShell.
- List Dynamic Distribution Groups:
- Run the following command to list all dynamic distribution groups in your Exchange organization:
Copy code
Get-DynamicDistributionGroup
This command will display all dynamic distribution groups, including the one you just created.
Get-DynamicDistributionGroup

Conclusion
You have successfully created a dynamic distribution group named “Designers” in Microsoft Exchange 2019. This group will automatically include all users in the specified OU, making it easy to manage and communicate with specific user groups based on their attributes. For further reading on managing distribution groups in Exchange 2019, consider checking out related articles on how to create and manage both static and dynamic distribution groups.
Follow this article to learn more about how to create a dynamic distribution group.
Also, read this article: How to Create a Distribution Group in Exchange 2019.

